Best Photoshop Deep Etching Service and Its Benefits

Photoshop deep etching is the process associated with the image background removal mostly used by graphic designers to edit digital photos. It’s basically a technique that helps them cut out a specific part from a 2D photograph to make it alone and manipulate that portion on a different background in the desired way.

Are you looking for the best Photoshop deep etching service provider or tutorial that will assist you to have your beautiful photos more professional and customer-friendly? Then you’re in the right place to avail of the opportunity. This article will walk you through deep etching procedure, its benefits as well as services you need to adopt.

Deep Etching Meaning

Deep Etch or clipping path is a closed vector shape or path created by designers with a view to cutting an object out using Photo Editing tools like the Pen tool. The process to perform deep etch is widely known as deep etching, and probably the most frequently utilized technique in Adobe Photoshop as well. You’re to use this method when you need to extract an object from its background in a photo. And the very crucial thing to deep etching is to choose the right selection tools for the job though.   

Photoshop Deep Etching Process

Prior to making a decision for the selection tools, you’ll have to choose the method you would like to apply to deep etching. Three methods in Adobe Photoshop facilitate this technique though, utilizing the best one goes up to you as each has its own tricks.

Method 1:

You can use the background eraser tool in order to do deep etching manually but the difficulty with this tool is that you can’t cut out the object accurately. In this situation, the image you’ll manipulate can look touched up and it will take a long time too. If any image that has detailed edges you can’t apply this method to it as it will take 5 hours to the maximum to deep etch it, otherwise the image will lose sharp edges.  

Method 2:

Using the Color Range tool to pick and remove the specific color from the photo will leave bits. And the trouble with this is that a standard photo contains millions of colored pixels. Also, you’ll finish removing so much or very little if you’re not aware of what you’re doing and unknowingly you will go to remove ghost pixels anyhow.

Method 3:

But the preferred method to perform deep etching is to use the Pen tool as this method has some incredible benefits you’ve ever imagined.

  • If you use the Pen tool you’re not to erase all on the original photo during the deep etching process. And you can manipulate it until you’re 100% satisfied.
  • You will have full authority over the tool, therefore, you’re capable of editing it at your wish and the deep etching will look professional.
  • For deep etching purposes, you’ll have to select a photo of high contrast between the bits you would like to erase and the selection you want. The tool makes an isolated layer in Photoshop overlaid on your photo. This means you’re not to change the original image.
  • The tool makes a dynamic shape or path that permits you to retouch the image even though you’ve finished it. And this feature has made the Pen tool very great and distinguished from other selection tools for performing the deep etching tasks.

Starting out Deep Etching Process


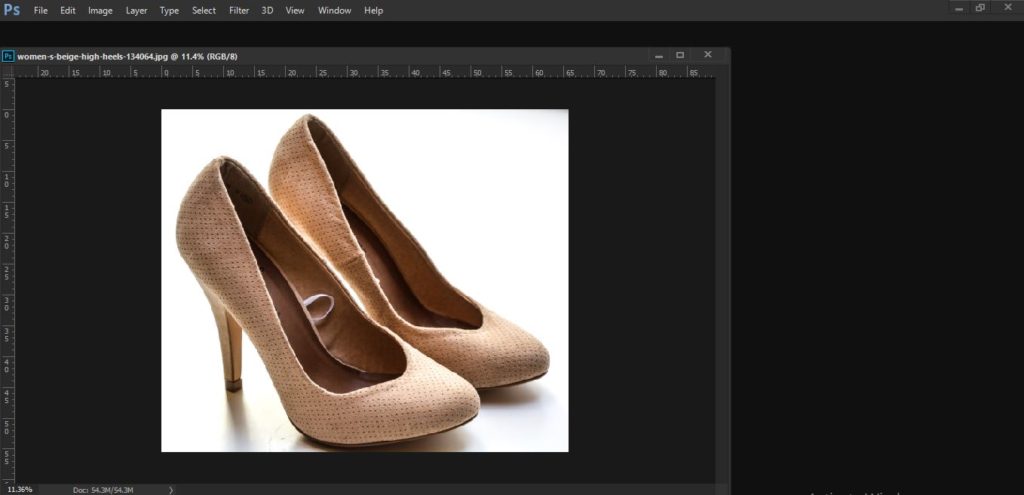
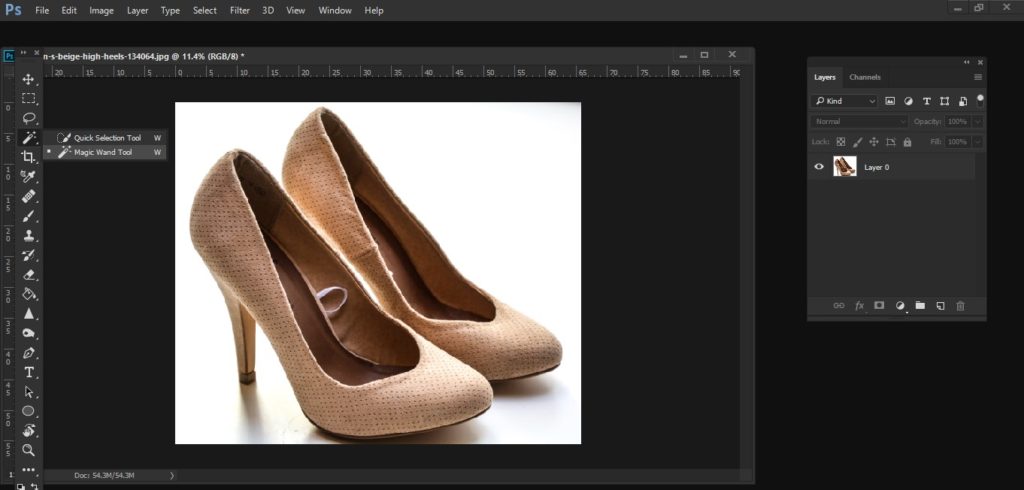
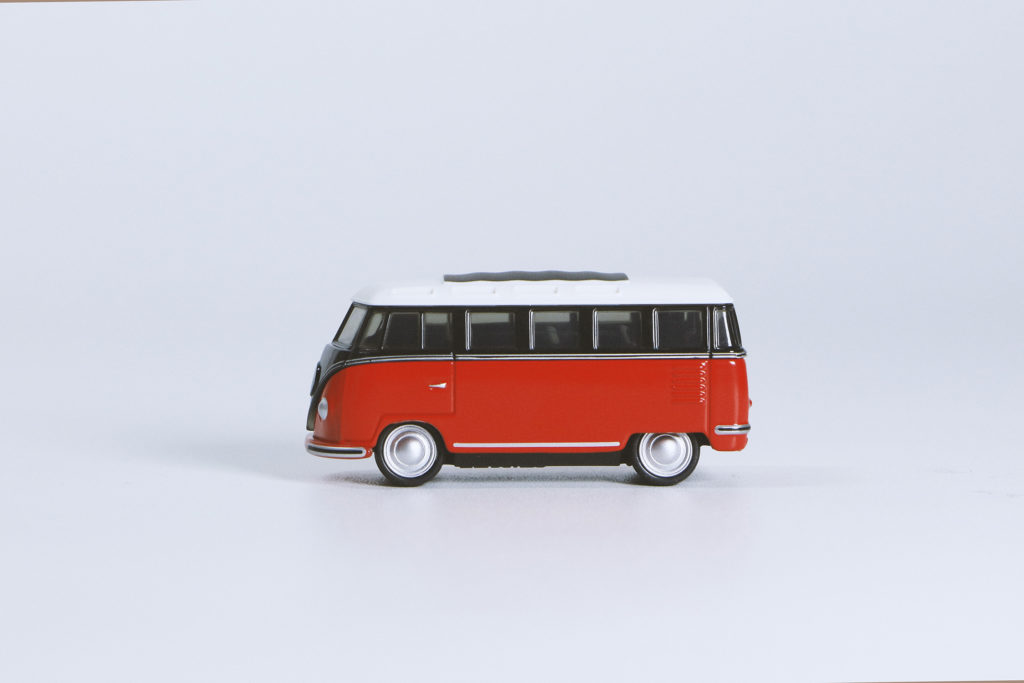
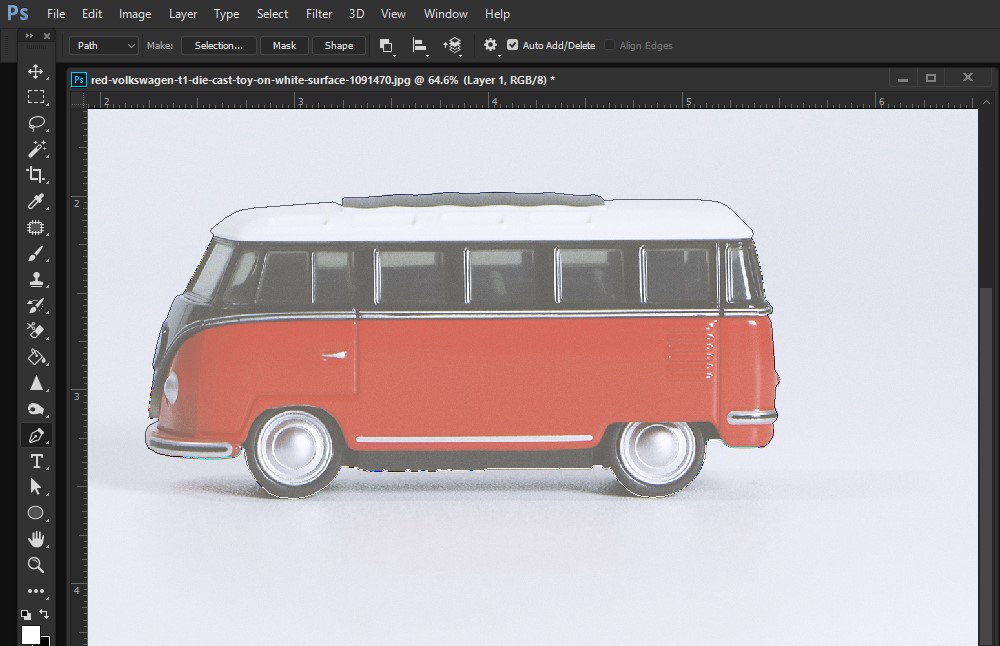
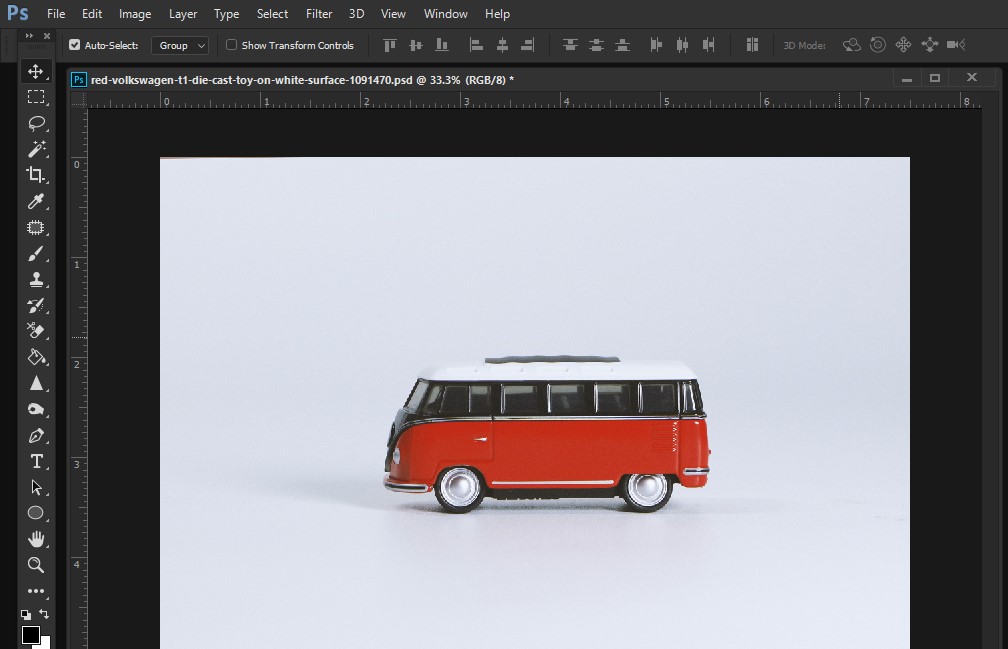
For instance, I’ll do deep etching a car photo that will help you understand the whole process.

The Pen tool icon on Adobe Photoshop is the tip of a fountain pen to look at. And it’s placed in the middle of the toolbar of the application window.

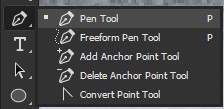
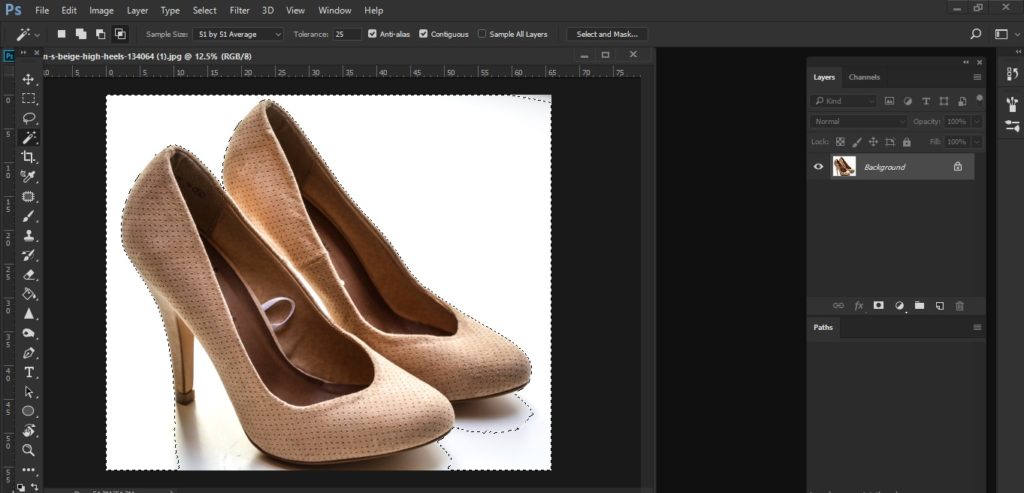
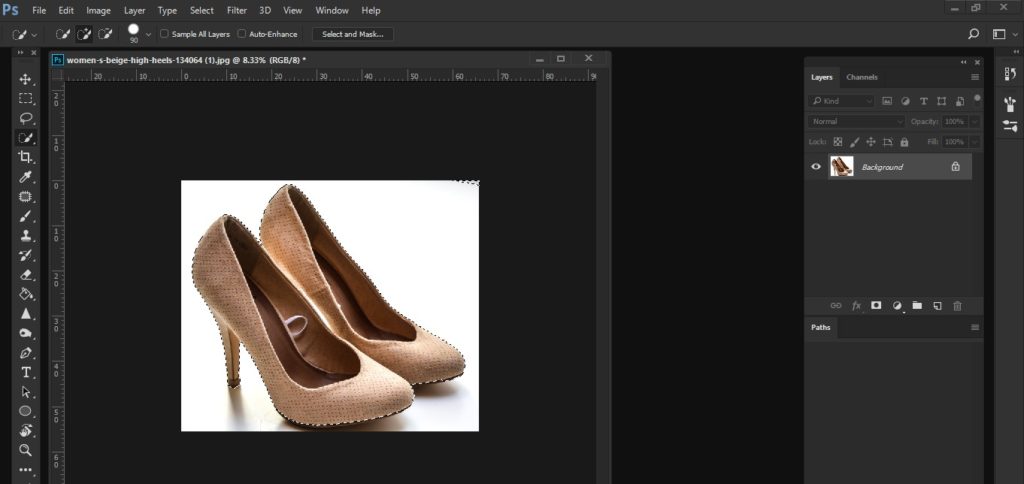
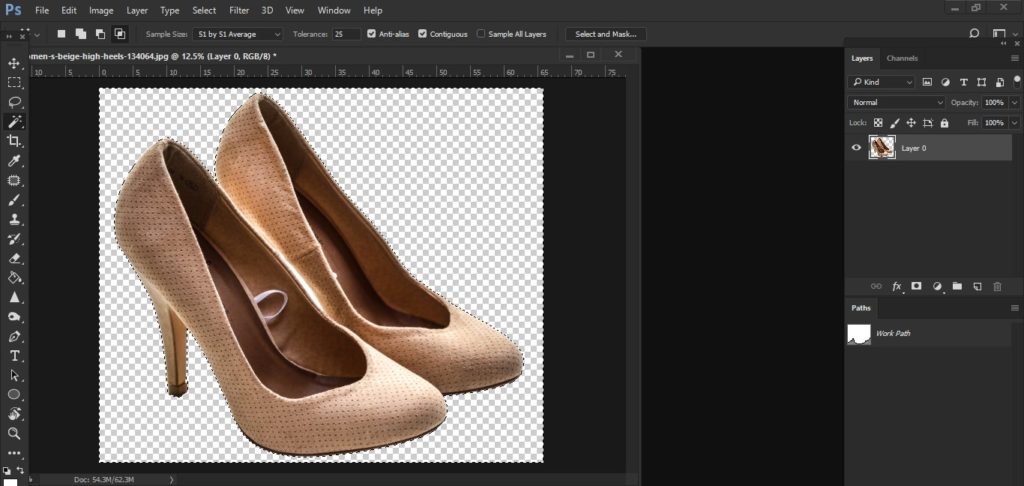
Open the image in Photoshop you would like to do deep etching or clipping path and choose the Pen tool. Click on the photo on the border where the background and bit have mixed.

In this respect, I’ve clicked on the border where the lower middle of the car and the background mingled and this makes a point on the photo. Then, I create another point making another click on the photo. While I have the mouse button pressed, I drag the mouse a bit to the right or left. You’ll find that I’ve made a point containing two handles as well as a line that links this point to the next point. Don’t fear the handles at this point, we’ll make little adjustments using them later.

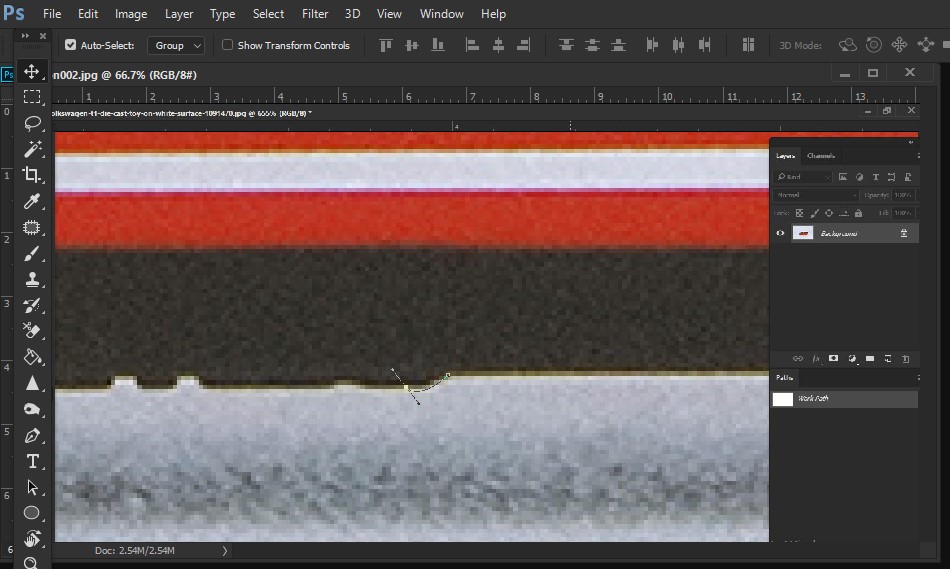
Continue making more points to outline the whole image you would like to do clipping path.

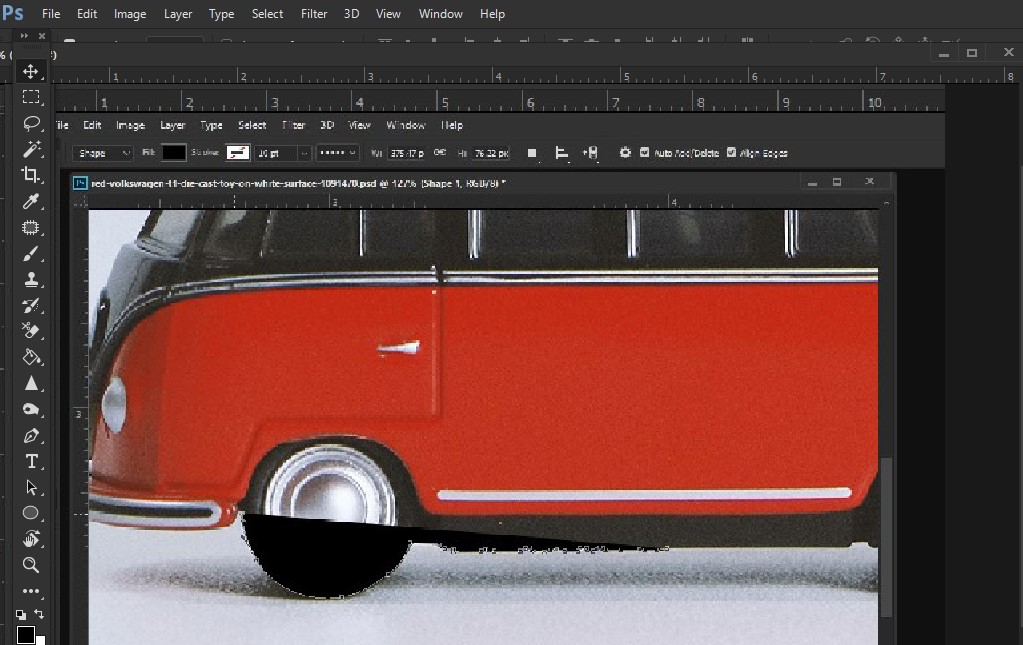
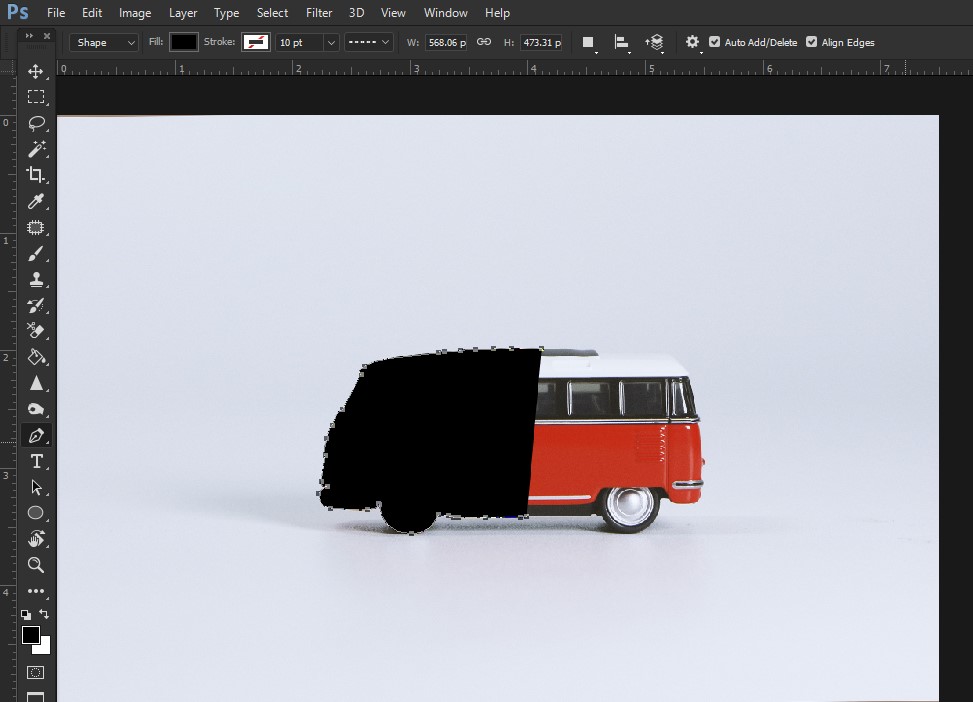
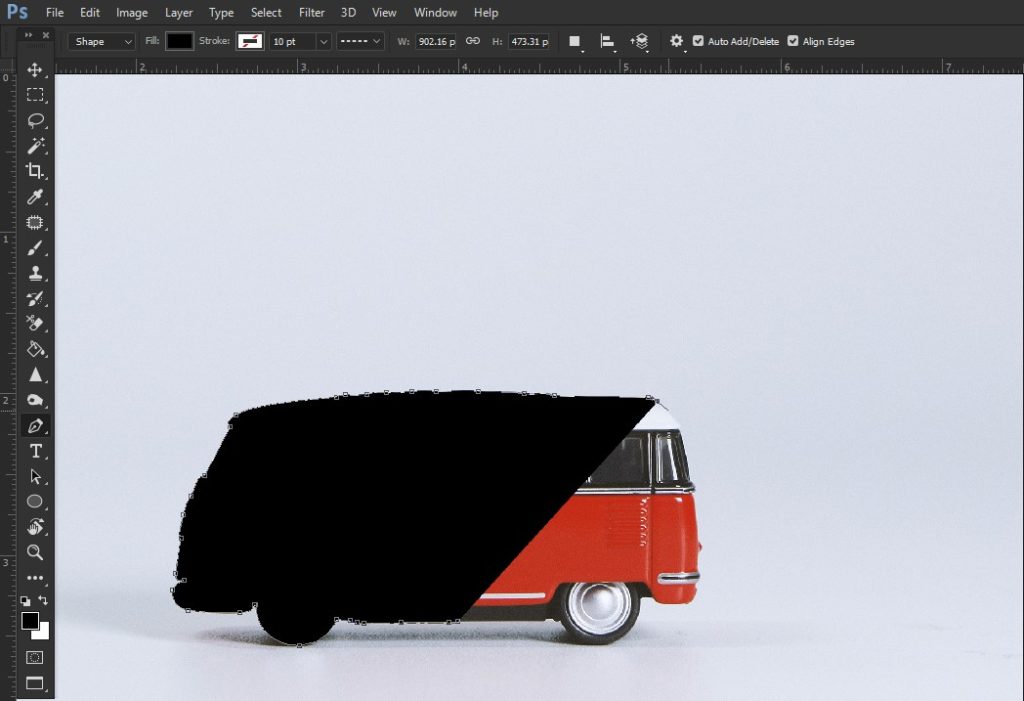
As you could view, I’ve made a rough outline of the car, although it’s not flawless, here you’ll find the fundamentals. The black in the photo you see is a just shape layer. The car is still there and the layer assists you to see where the outline is done.

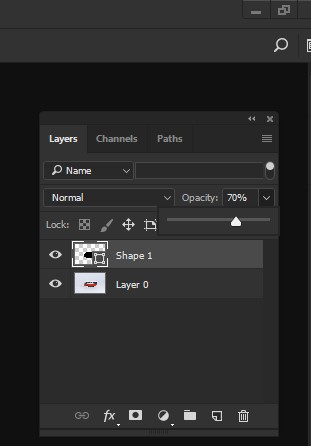
In order to adjust the outline in the next steps, I turn the opacity to 70%  but I can still view where the outline is. At this moment,  I’ll show how to make an outline perfect.

Making Adjustments to Outline

Before making an adjustment to outline, you need to zoom in the whole outline to check where some more work needs to align flawlessly with the car. Select the Direct Selection tool and click on the point you would like to adjust.

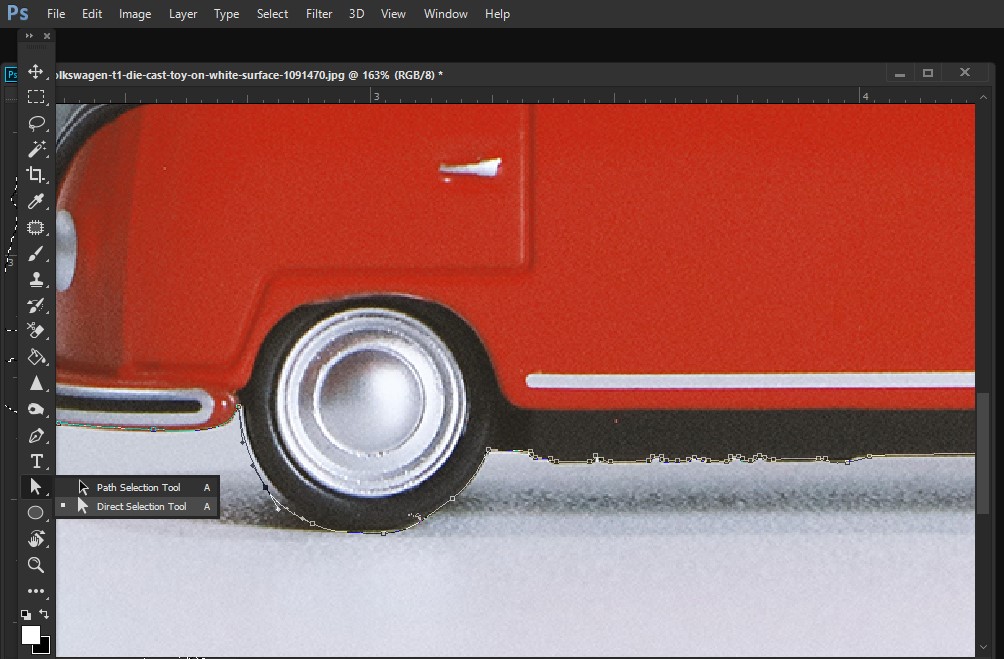
Little hands appear and by selecting one of them and move them everywhere until the outline is adjusted.

In this way, continue making adjustments to outline as you wish.  Also, you should work zoomed in on your photo to exactly adjust the lines to the outline. Being a perfectionist, I feel comfortable to perform a zoomed-in minimum of 600% plus.         

This procedure will maybe take a long time to master it though, but you need not be disappointed. A bit of practice makes you do the deep etching task like a professional within a short time.


Saving outline

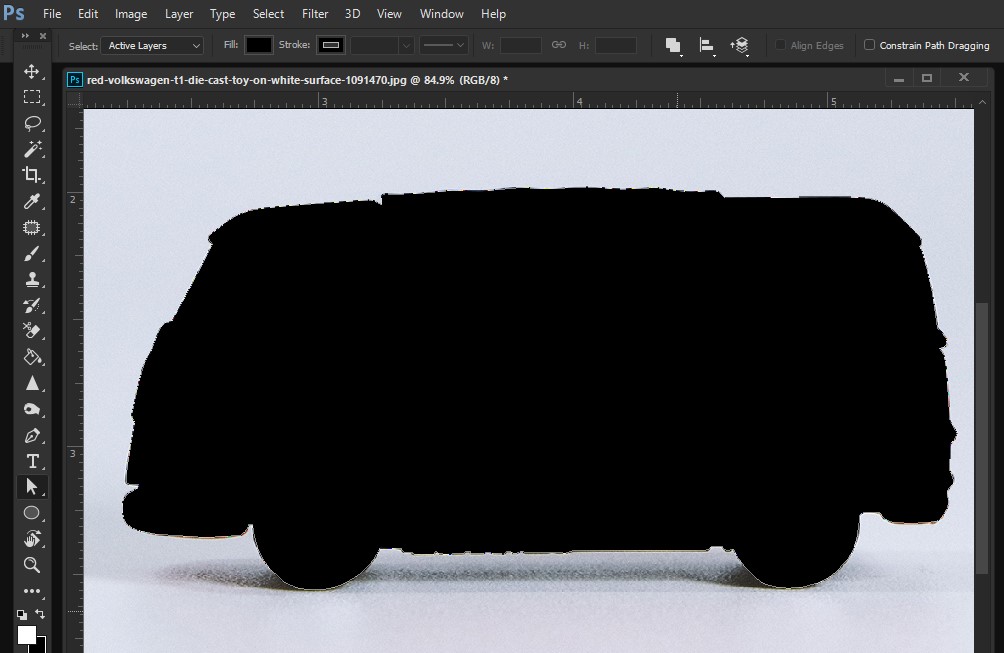
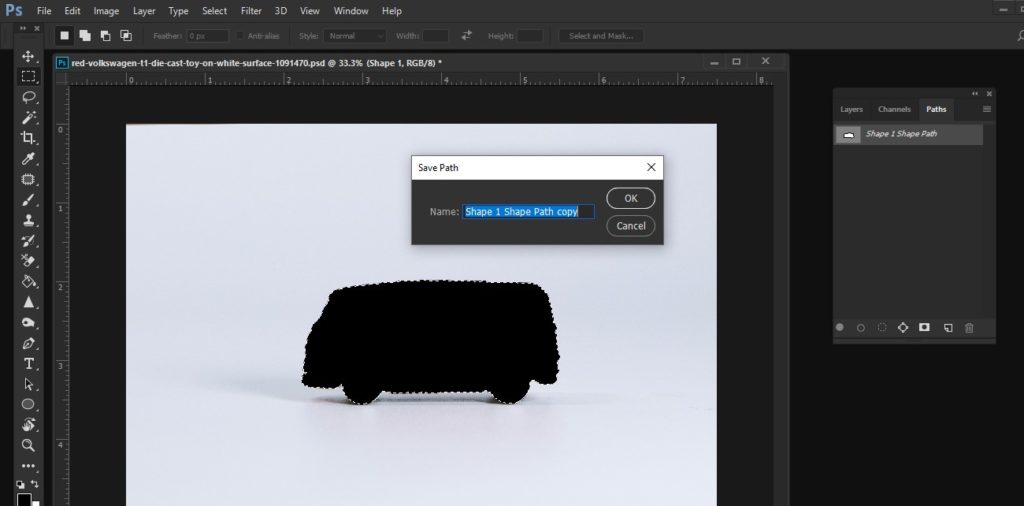
On the Layers tab, you’ll find the Shape 1 layer made with the earlier steps. With this layer highlighted, press the Paths tab and you’ll find a layer named Shape 1 Shape Path.

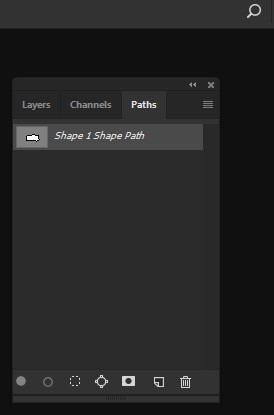
Once you double-click on the Shape 1 Shape Path layer, you’ll find a pop-up box asking you to rename your path. Pick a name for your outline and simply click OK.

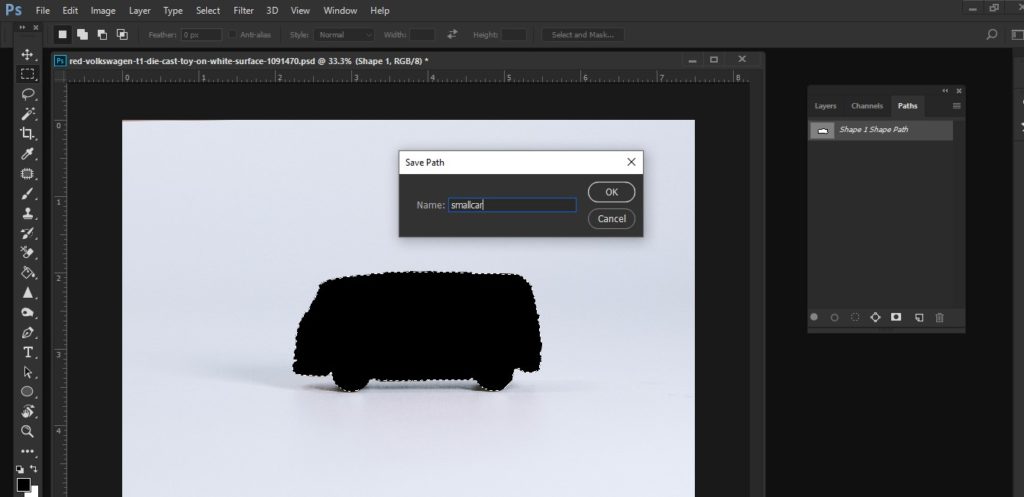
Now your outline is safe and secure, and if you mistakenly delete the shape layer, there will be no problem. I named my outline as ‘smallcar’ but you can name your outline in your own way.

Select the path you’ve just saved; my file is ‘smallcar’. At the bottom, you’ll discover several options that permit you to work the layer.  Now we’ll utilize ‘Load path as a selection’ – the third icon from the bottom left of the Paths layer. And this icon looks like a circle containing a dashed outline.

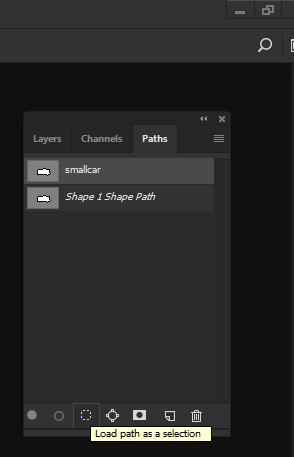
Now click on this icon and then return to ‘Layers’ tab.

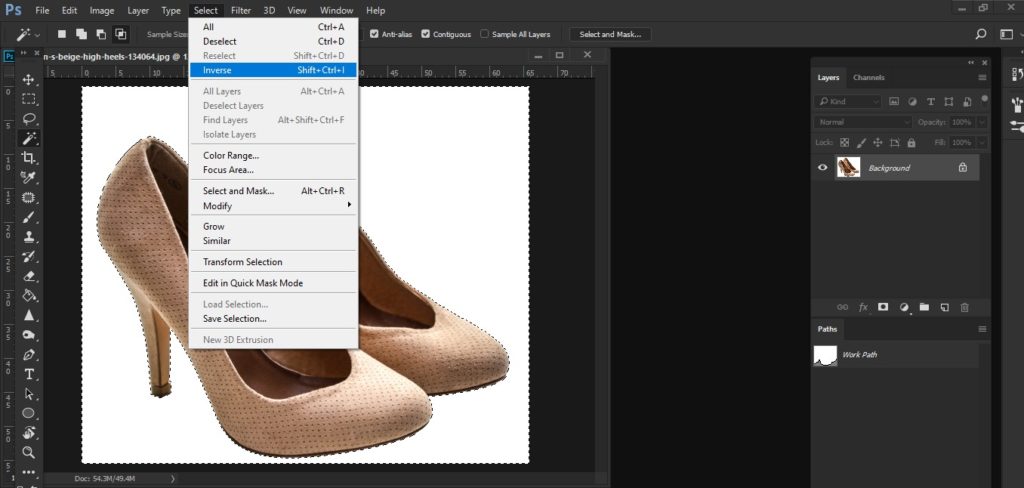
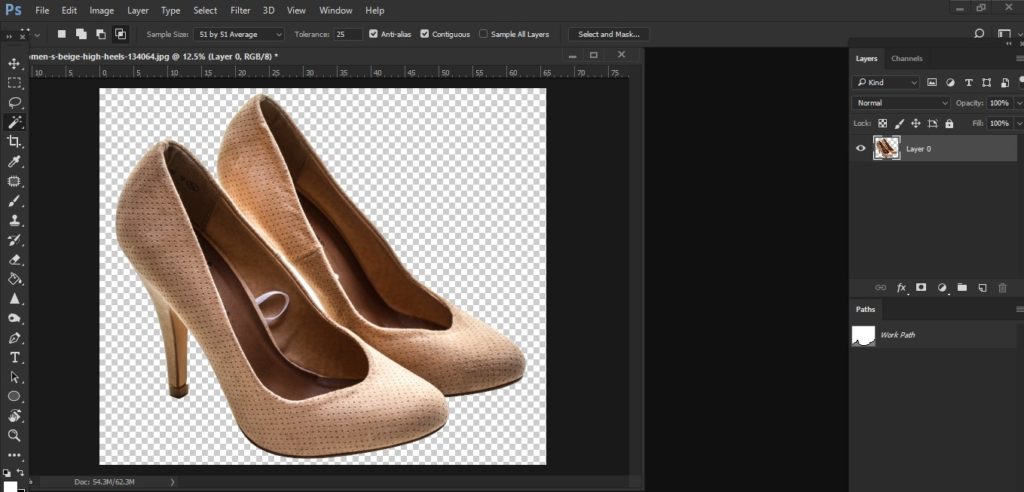
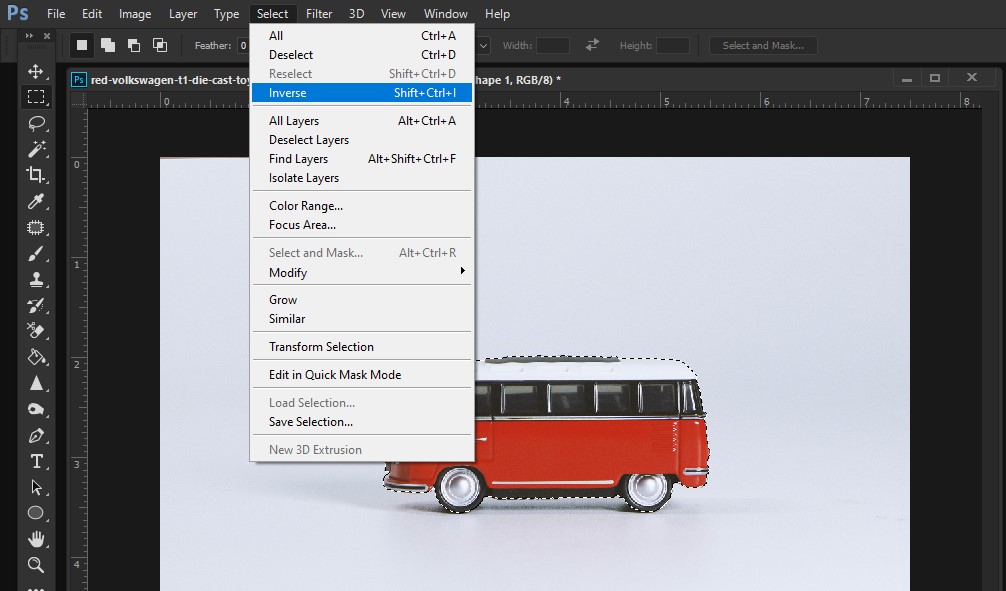
You’ll find this command has turned your path outline to a selection. And the selection looks like ‘marching ants’ around the car above. At this phase of the deep etching process, you need to duplicate your original photo layer to gain two copies of it. And one will be for the backup in case you make something wrong.

Now you need to press Windows Ctrl+Shift+I to select the inverse. Or simply you need to go to Select and then to Inverse from the dropdown menu to do so.

And then press Ctrl+D to deselect the selection. Or simply go to Select > Deselect from the dropdown menu from the application window.

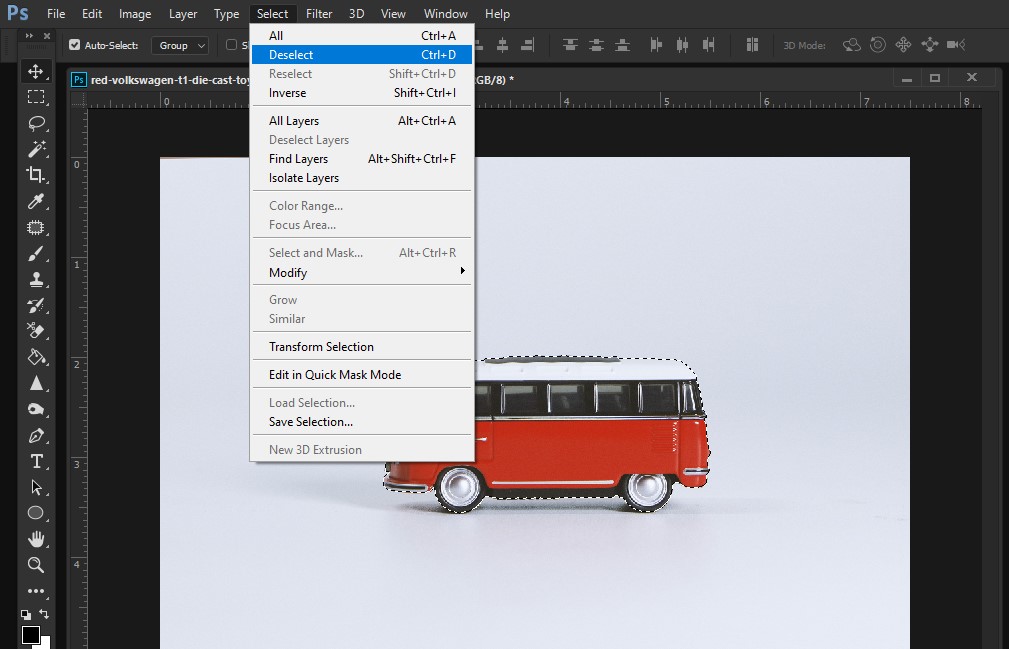
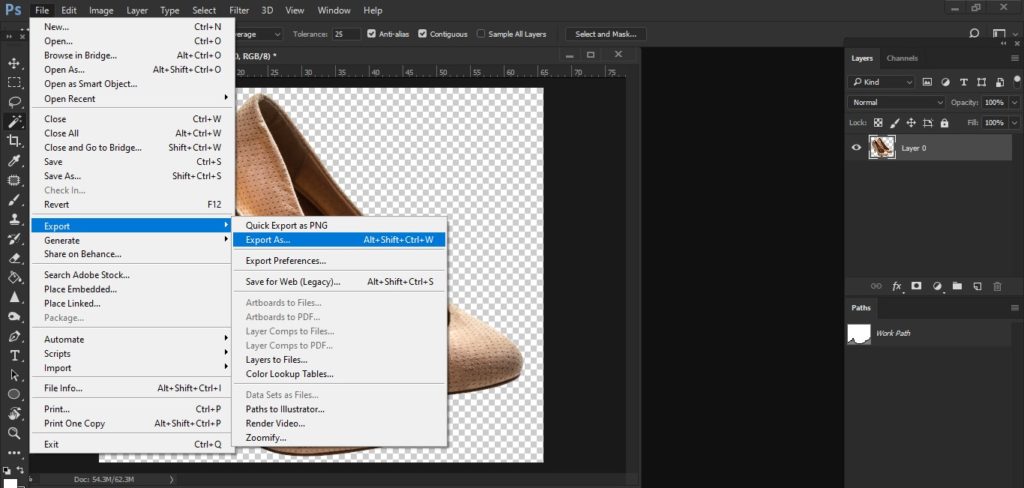
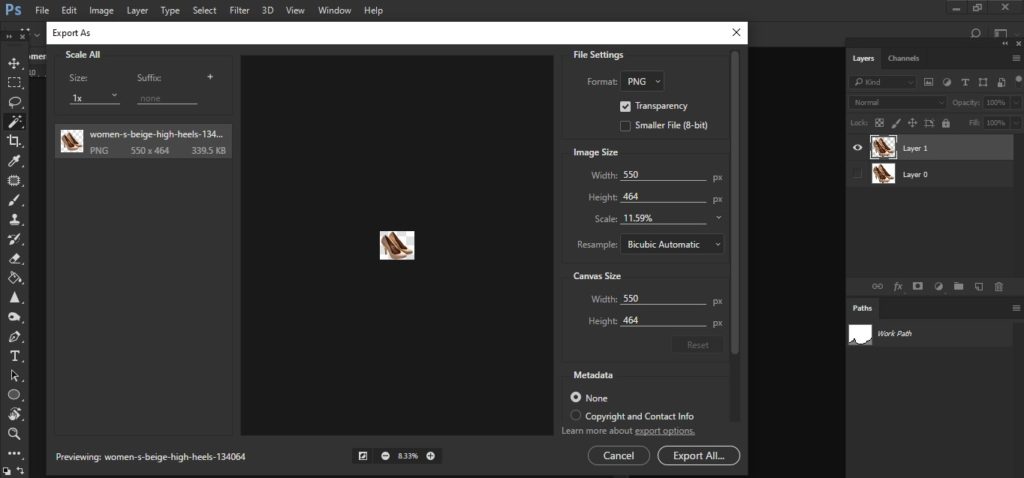
This command has changed the ‘marching ants’ outline and you’ll get it there. One deep-etched photo you can utilize in the way you wish.

Benefits of Photoshop Deep Etching Process

Deep Etching is the fundamental process to edit any photo that helps graphic designers retouch images in their own way. They perform mainly the following photo post-production tasks applying this procedure.

Removing Background from an Image


To remove background from a photo is very crucial as a dull background can destroy the amazing look of a photo and also can divert the attention of an online customer. Therefore, online retailers always expect appealing backgrounds that can make images outstanding and enticing to draw the attention of shoppers. So, deep etching is the most useful procedure to change the background from a photo.

Performing Image Masking

The Image masking process is very helpful to remove background from an object having fur, hair or hackles in a photo. Deep Etching makes this image masking method very easy and wonderful to create professional photo more stunning and sterling.  

Perfect Object Color

No matter how perfectly you’ve captured product photos, objects in product photos need a color change. And only deep etching process, in this respect, is a very useful way to rightly change the color of an object in a photo. Whilst you alter the color of an object using this procedure, it won’t impact the image background at all. And also you can make the object look in your desired color.

Photo Retouch

A 3D artist needs to retouch photos very perfectly and subtly. They apply some effective methods that won’t spoil the 3D effect of the image. And so deep etching is such the best method that helps them retouch photos exactly.

Photo Manipulation

In respect of alleviating undesired parts in a photo, image noise, and distracting images, deep etching is the best technique. You utilize this method to mainly make an image crisp and natural. Therefore, for manipulating any photo, there is no alternative to a deep etching process.


Who Needs Photoshop Deep Etching Service

Deep Etching service is most needed in almost every field where digital images are created and utilized. Professional photographers, photo agencies, advertising agencies, online retailers, fashion house owners, and graphic designers can’t imagine having their photos edited without taking this service from a professional photo editing company.

Professional photographers or photo agencies are always in need of deep etching tasks as they deal with lots of photographs every day. If there is any object in the photo, it can make this photo dull and unattractive. But they are committed to delivering top-notch images to their clients. And due to time limitation, they rely on outsourcing photo deep etching service.

Online retailers or sellers need this service most as they require changing backgrounds of images. Vendors at major eCommerce markets have to comply with photo editing guidelines to deal with different image backgrounds. And the main objective of deep etching is to remove background from a photo without affecting the object.

Advertising a product in the newspaper or a magazine has become a day-to-day affair. Without a deep etching task, a product photo never goes to dailies. No matter whether products are new or old, all product photos need deep etching or clipping path services for advertisements in media including newspapers. So, advertising companies or magazine professionals are taking deep etching services from a professional deep etching company or hiring designers to perform this task.

Fashion houses regularly organize photo session and after capturing photos, they review their images to check out them. They send their images to photo editing companies for deep etching purpose and they save their time and effort. A good retouching company like Graphic World 24 can provide the best deep etching services to their clients at a reasonable cost as they professionally skilled graphic designers

Final Words

I think this article will satisfy your curiosity about the overall Photoshop deep etching and its necessity in the photography industry. If you have any insight into this photo editing process to add, please feel free to share it in the comments.

#BestDeepEtchingService
#DeepEtchingPhotoshop
#BestClippingPathService
#DeepEtchingService
#PhotoshopDeepEtching


How to Make Image Background Transparent In Photoshop

Making an image background transparent using photo editing software like Adobe Photoshop not only provides an excellent array of astounding showcase choices for your eCommerce products but helps design images in different looks. An image transparent background is very helpful to put a product against such a background which can assume various colors dynamically.  Images designed in such backgrounds on highly responsive websites can interact in different ways with backgrounds depending on the user’s screen. Thus, the transparent background can create extra contrast, peculiarity and even visual interest to your overall image look. 

In Photoshop, making an image background transparent and saving the done file in perfect format is somewhat easy if you have gained a little knowledge about photo editing in Photoshop. This photo editing tutorial will show you how to perform the task in a slow but effective way.

Step 1:  Open Your Photo in Photoshop


The first step starts with the opening of the image in Photoshop. It’s better to open the image in JPEG format and in a white background. In this respect, I’ve chosen a pair of ladies’ shoe image and got opened in Photoshop.

Now go to Layers panel, it lies in the right of photo window but if you’re not able to find it, then it can be accessed by going to Window, then to Layers from the dropdown menu.

In Layers panel, once you double-click on the Background layer, you’ll find a New Layer appears asking you to rename it. You can rename it or leave it as Layer 0 by pressing the OK button. In this case, I leave the layer as Layer 0 and press OK.

Now the Background layer is unlocked, and you can get a transparent background look whenever you delete anything from it.


Step 2: Create Selection


Now comes the turn is to select the object, not the background. In Adobe Photoshop, you’ll find several selection tools to select an object in the image. But in this respect, you’ll have to choose the Magic Wand tool rested in the toolbar on the left-side in Photoshop.

Afterward, press Ctrl+ Click on the white background of the image and view the result what it looks like. Photoshop will try to pick the object from its background. And the selection will look like ‘marching ants’ around the selection.

In case, you’ve not made selection rightly, then you can utilize the tool to remove background from the selection. In this instance, we’ll use Subtract from the selection tool icon to remove shoes’ shadow from the selection by clicking on the parts of the shadow with the tool until the selection contains only the shoes.


Step 3: Remove Background


Just when you’ve finished selecting the whole object, press Windows Ctrl+Shift+I to select the inverse. Or you may go to Select and then to Inverse from the dropdown menu to do so.

With the selected inverse, now press Windows BackSpace and you’ll find this command has made image background transparent.

Image background transparent is indicated by white and grey check pattern and if you would like to deselect the selection, just press Windows Ctrl+D.


Step 4: Save Photo in the Perfect Format

Saving the photo in the perfect format is very crucial if you would like to upload it with a transparent background on your website.  The suggested format to save your done photo is PNG-24. And it never allows pixelated halo when embedding images in various colored backgrounds. But it happens in the case of GIF or PNG-8 formats. 

You can save your images in PNG-24 formats by pressing Windows Ctrl+Alt+Shift+W. Or you may simply go to File, then to Export and then to Export As… from the drop-down menu of the application window to do so.

A dialog box appears, and under File Settings on the right side of the dialog box, you’ll have set file format as PNG and confirm that the Transparency box is checked. Never check the Smaller File (8 –bit) box as it will convert the file to PNG-8 format.

On the left-hand side of the dialog box, you’ll find file size for your PNG format and file size should be minimal as much as possible. My recommendation is that per website image size should be 200KB or less to accelerate website loading speed. While on the right-hand side, under Image Size, there is the option to increase or decrease the Height and Width of the image. That is very helpful to adjust image size as well. A smaller dimension means smaller image size and a bigger dimension means a bigger image size. Nevertheless, you must not set the dimension reduced than you would like to get them to look on your website. And for doing so, images may be pixelated or blurry.

Your product image should be saved at a minimum of 50% larger than the size you would like to expect it to show. And it’ll make customers spot your product on a retina display. Retina display involves the capacity to show product images crispy on all the devices, and this doesn’t create any pixelated issues. For instance, if you would like to display your product at 450px wide on the website, then you must set images at a minimum of 650px wide here. That’s why there will be a while balance to maximize your photo size if you feel like to minimize file size.


Step 5: Save Your Done File

When you’ve finished setting image dimension, press Export All…..

Once Save dialog box appears, select the folder in which you would like to save the images for displaying on a website. And separate optimized image files from original image files not to make confusion when loading images on the website. Name your file name and set the file to.PNG format.

Click Save.

Now you can change image transparent background using various backgrounds you choose for your eCommerce website. And you should show it in the way customers will be captivated to view images and decide to buy a product.

Final Words


This is the best way to remove background or change background from a product image, first, making image background transparent and then altering the background. I hope this procedure will be very helpful to change any type of image background if you’re accustomed to editing images in Photoshop. Provided that you think I’ve escaped any point in the article, please feel free to share it in the comment.

#ImageBackgroundTransparentPhotoshop
#ChangeImageBackgroundTransparent
#RemoveWhiteBackgroundImagePhotoshop
#PhotoBackgroundRemovalService
#BackgroundRemovalService
#RemoveBackgroundService

Photo Editing Guidelines for eCommerce Marketplaces

Lots of eCommerce marketplaces are running their online business across the globe and amongst them, some are playing a leading role in some countries like China, the USA, UK, Canada, Japan and so forth. All eCommerce sellers are selling various sorts of products on their websites with great success. Despite this, they’re facing challenges to boost their products and increase sales. Though they’re selling products with attractive images to induce customers, they’re not getting probable responses from buyers. Apart from this, many vendors are not utilizing aesthetical techniques for their product images, hence eCommerce platforms have professed photo editing guidelines that will be helpful for product exhibitions. This declaration of image editing requirements has made photo display cooler and smoother for both buyers and sellers.

This article will give you a good idea about the ins and outs of photo editing guidelines of eCommerce Marketplaces that sellers are compelled to comply with. And you might be hassle-free from violation of the requirements and uploading wrong product photos.

Amazon 

Amazon is the major eCommerce platform in the United States, United Kingdom, and Canada. Nowadays, more than 80% of the total shoppers of these countries buy products from this platform. In order to allure customers by product images, Amazon has specified some photo editing requirements that sellers must comply with while uploading product images. They have declared two kinds of image requirements and some disallows for listing Amazon products.

Technical Requirement

  • Product images must be in JPEG, PNG, Tiff or GIF formats.
  • Photo dimensions will be a minimum of 1000 pixels or more in both height and width.
  • Color code must be CMYK or sRGB
  • Names of the file must comprise of product identifier (Amazon ASIN, 13-digit ISBN, UPC, JAN, EAN) followed by a period and the proper file extension (for instance, 0237425673485.tif. or B000123456.jpg)
  • Usages of dashes, spaces, or extra characters in the file name will avert your product photo from being online.
  •  

Amazon Site Standard Product Images

The image must be a professional photo of the product being sold. No illustrations or drawings of the product are permitted.

  • The photo must be professionally photographed, lit and skinned with accurate color, being in focus.
  • The photo must not comprise of confusing or gratuitous extra objects.
  • The background of the image must be pure white (RGB 255, 255, 255)
  • The image must not have extra graphics, text, or inset images.
  • Music, Books, and Video/DVD photos should be the front cover art and must fill the 100% of the photo frame. Promotional stickers, jewel cases or cellophanes are not permitted.
  • Photos of other products must fill 85% or more of the photo frame. And the product must be in the frame.
  • Images must not cover any pornographic or offensive materials.
  • Images should be close-up or cropped.

Alibaba

Alibaba is another largest eCommerce platform that is operating business around the globe using multi-lingual websites. Through this marketplace, sellers are selling thousands of products from over 40 major categories in 190+ countries and regions daily and comply with product image specifications applied by Alibaba. Despite this, many vendors don’t know the right Photo Editing Guidelines of this platform and upload images without knowing the specification. Hence, they don’t get the expected results from selling products. In order to help them, we’ve outlined the image editing requirements of Alibaba eCommerce platform here.

Requirements 

  • Image backgrounds should be of light color that will not hamper the main product. You must not use messy backgrounds, and background color must not be identical to that of the product.
  • The prime image should show the entire product clearly and you must display the front view of the product so that the product to be centered. You must not display merely a portion of the product or multiple products in a single image.
  • It’s better not to use your company logo in the product image, nevertheless, if you feel like to use the company logo, then you can utilize it in the top-left corner of the product photo. You must be sure that your logo doesn’t hamper the product image and don’t place it on the edge of the photo.
  • You must not use text or frame in the main image because they interfere with the product. Avoid using promotional offers, watermarks or QR codes in the images.
  • Images must be square in size and be of at least 640X640 pixels. Products must be clear and centered in the images.

Image Features

  • You must create and utilize photos in the way customers would like to view them, for instance, front, left, right and back portions of the product. Display the details of the product in the image and include any special features the product has.
  • Your product images should be as bright and clear as possible and contrast should be in the right way.
  • Your product photos must maintain consistency and should be of the exact product you’re going to list. Make sure that you don’t use images of other products. 

eBay 

eBay is another eCommerce platform leading in the USA and also puts emphasis on high-quality product images. For eBay listing, your photos must be better than 1000 words and worth 5% more selling. eBay also declared some photo editing requirements for their product photos.

Photo Requirements

  1. The minimum image size is 500 X 500 pixels and a maximum size of 900×900 pixels. Image background must be of white or light gray color and image formats may be png, jpeg, BMP, gif, or tiff.
  2. You must not use borders on any photo items except that it’s the natural border.
  3. Product photos must cover 80%-90% of the frame and must be realistic in look, size, and views.
  4. Photos must not contain text or artwork, such as sellers’ logo or ‘free shipping’.
  5. For each product, the number of images may range from 12 to 20.

Walmart 

Walmart is another American multinational retail company operating more than 8,000 stores and clubs in 27 countries, most of them are found in the USA, UK, Canada, and Mexico? In these stores, many people are selling different types of products successfully. But concerning product photo editing guidelines, there are some restrictions as Walmart has recently changed photo requirements, and for that, some sellers can’t get expected returns from sales. Here we’ve depicted updated photo requirements of Walmart for your best understanding.

Requirements 

  1. With zoom capacity, now product images should be of portrait (4:3) and of 1500X 2000 pixels (wide x high). But without zoom capacity, images should be of portrait (4:3) and of 600x 800 pixels (wide x high). Swatches will be of the square (1:1) and of 100 x100 pixels.
  2. Image size must be of 1mb or less, and acceptable image formats will be JPEG, PNG, and BMP.
  3. You must not include any advertising languages, watermarks, borders or text overlays in product images.
  4. Images must be professionally shot, lit, and in the focus. The image background should be in the seamless white background (255/255/255 RGB).

However, without product photo retouching, you can’t expect the maximum benefits from product sales and can’t be a successful vendor. High-end quality photos are very essential for promoting your sales and boosting your brand, and hence you should upload professionally edited product photos for the most customer engagement.

Graphic World 24, an outsource based photo design and retouching firm that has been servicing eCommerce sellers, product photographers, and photo agencies across the globe since 2007 offering exclusive quality as quality is their main concern. If you’re an online product seller and need high-quality product photo retouching to meet photo uploading requirements applied by the major eCommerce platform, then Graphic World 24 is committed to providing you with the best services.

Their main services include clipping path, photo background removal, color correction, photo masking, neck joint and what not. They have 50 designers and 3 quality controllers who work around the clock to maintain the turnaround time and try at their best to give the best services. If you’re interested or would like to test their quality, you can send free trial images by clicking here.

#PhotoEditingService
#PhotoRetouchingService
#PhotoEditingRequirements
#AmazonPhotoEditingRequirement
#ImageEditingGuidelines

Impacts of Photo Manipulation Services

After a business is commenced by an entrepreneur, his/her primary goals are to set strategic plans to boost business right way. In this era of competitions, only shrewd entrepreneurs can reach their goals by adopting newly innovated devices that help them succeed in business. Nowadays, the indispensable component of modern media including social media, print media and electronic media is photography. The description is incomplete if there is no use of photographs and illustrations. Customers always would like to look at products or services that include pictures depicting reality and originality. If they’re enticed with the images, only then you build up their minds to purchase the products or services. That’s why, after the photoshoot is complete, photographers perform post-processing to make photos more professional and clickable. Now we’ll discuss the impacts of photo manipulation services on global business in detail.

Photo Manipulation Boosts Your Business directly

With the help of internet marketing, entrepreneurs are expanding and scaling up their online presence to bring their business to the next level. As far as digital marketing is concerned, utilizing perfect images can assist your marketing campaign successful. Photographs are such an instrument that can directly grow your business and boost your brands. They can tell your products or services very shortly but effectively. Therefore, if you manipulate your product or service images accurately and exactly, you might improve business overnight in this era of vast completions.

A device to exceed opponents

With the innovation of new strategies to grow online or eCommerce business, entrepreneurs are trying to surpass competitors at their best and have been successful as well. They are adopting various tactics that can be effective and instrumental to improve their business and go above their competitors. Any business whether it’s leather, textile, software, food, shoes, real estate, merchandising, or manufacturing – in all respects you face severe competitions, and using professional photographs might be very helpful for a marketing campaign to overcome it. Since customers always seek a very shortcut way to purchase products or services, realistic and natural-looking images may be a device to entice them. But you need commercial images that you may need to exceed your competitors. In this respect, the impacts of photo manipulation services are very great.

The best way to Increase Sales

There is a saying ‘A picture is worth a thousand words’ and modern entrepreneurs have realized the importance of it and are utilizing quality images to boost their sales. If your product or service images can allure customers, they think they’ve found the right product they’re seeking. A customer doesn’t have so much time to study the entire product description. And they take the decision to purchase the product only viewing the images. If your business images are well-manipulated or retouched, then they must be helpful to increase sales. That’s why business owners or entrepreneurs are taking high-quality images as an instrument to boost up their sales.

A strategy to boost your brand

An entrepreneur always attempts to raise brand awareness among the customers to flourish the business. If customers know the brand of any company, they show interest to buy the product of that company. Photo Retouching allows companies to boost brand if images are used perfectly. Numerous companies are taking advantage of using photographs to flourish business and improve the brand. But they’re not getting the expected results for want of enhancing and polishing. Taking photo manipulation services, you’ll also have to reuse images according to your needs and make them customers friendly. Otherwise, you might not get the benefits of photographs for boosting brands.

A perfect image size helps your business

Image size matters for influencing your business. Utilizing the perfect size of photos is very useful to improve your business as improper size never attracts potential customers or visitors. If your website lacks the consistency of image size, then your monthly traffic will decrease and ultimately hampers your business. Perfect photo retouching might suit your photo size and help your business to grow. You can resize images in Adobe Photoshop or ask a photo editing company to make them according to your requirements.

High-end quality photos satisfy customers

Photos are the essence of eCommerce business and you can succeed in business if your images tell your products perfectly. High-quality images can increase your sales while poor quality photos might be the cause of business destruction. Every entrepreneur anticipates selling products at the highest level. But sometimes, it’s not possible if your product images won’t be able to draw the attention of the buyers. Customers naturally take the decision to buy products when product photos can satisfy them. Blurry and unattractive images never induce buyers to buy products and they may hamper your business. But adopting photo retouching service, you can make your business photos look top-notch and outstanding to satisfy your customer for better sales.

Achieve Customers’ credibility

The ultimate objective of a business is to gain customers’ trust and credibility. Customers’ trust is such a thing that helps a company to get customers as regular customers, and thus bringing the company to the next level. In this respect, photo retouching can have a very crucial role in making images as a helpful business tool for gaining customers’ credibility. For this purpose, you must utilize original photos on your websites and avoid using stock images. Taking photo manipulation services allows you to update images and achieve customers’ credibility.

Did you know the importance of photo manipulation service in business before? Have you started up a business and seeking the best image solution provider? Don’t worry. Through taking a high-quality image manipulation service, you can upgrade your website images and thus boosting brand and business. Graphic World 24, a globally recognized photo design and retouching firm is providing you with the top-notch photo editing services ideally suited for promoting business and bringing high returns.  

With vast expertise under our belt, we’re offering world-class image post-production services around the globe maintaining the turnaround time. Since our start in 2007, we’ve been able to understand clients’ needs and accordingly we provide the best photo manipulation services. Accompanied by exclusive quality, Graphic World 24 also provides a reasonable price that has made them distinguished from other companies around the globe. Hence, hundreds of clients have handed over us numerous photography projects to have the supreme quality from us. 

#EffectsofPhotoRetouchingServices
#BestPhotoRetouchingService
#EffectsofPhotoManipulationServices
#ImportanceofPhotoEditingServices
#ImportanceofPhotoManipulationServices

Tips for Choosing the Best Clipping Path Service Provider

Are you looking for the best clipping path service provider or deep etching company and don’t know the right process? Don’t worry. You’re in the right destination where you’ll find everything you need – clipping path, clipping path service and tips for choosing the best company.

Prior to discussing professional deep etching service provider, we need to learn about what clipping path is, why it is necessary and who needs it.

What’s Clipping Path?

Clipping Path or Deep Etching is the process of cutting out an object in an image by using a tool especially the Pen tool in Adobe Photoshop in order to change the background of a photo. Generally, graphic designers use this technique to manipulate or retouch any type of image perfectly and smoothly. If you’re an expert in doing this task in Adobe Photoshop, then you can perform deep etching tasks yourself otherwise you can get it done by others.

Why the Clipping Path is Needed?

If you would like to change background or edit photos, you must need a clipping path or deep etching technique. In any way, you can’t deny the importance of deep etching and its usages for photo manipulation or photo retouching. To edit a photo flawlessly, deep etching is very crucial for you, as with the help of this method you can make your beautiful images even more attractive and extraordinary.

Who Needs Clipping Path?

Photographers or online retailers to whom photographs are very essential need a clipping path. If they have a photo retouching team or if they retouch photos themselves, they don’t need Clipping Path Service. But if they’re busy and want to save them time and effort, they need this service. Deep Etching is largely related to photo background remove, photo retouching, photo color correction and many more. That’s why, who needs photo retouching must need a deep etching service.

Who Provides the Best Clipping Path Service?

If you google for the best deep etching service, you’ll find lots of clipping path service provider companies in Search Engine Result Pages (SERPs). But how will you determine who the best provider is?

This is the ordinary question that can come to your mind, and to get an answer to this reply you should consider some important factors.

Work Experience

You’ll have to check out for how many years the company has been providing clipping path service and how much experience do their designers have. A company with a long term photo editing experience should be your choice as they can never cheat you, and you can trust them for any photo editing projects. Only a photo editing firm with skilled graphic designers is committed to offering the best deep etching services.

Company Reputation

While choosing the best deep etching company, the thing you should take into consideration is the reputation of the company. A reputed and trusted firm can guarantee your photo editing requirements maintaining the turnaround time that is very essential for a long term relationship with the company. Make sure that the company has lots of happy and satisfied clients by studying customers’ reviews on their website. Also make sure they’re a leading eCommerce photo editing service provider and don’t provide another photo editing like a family photo, wedding photo and so forth. If they retouch all types of photos, then they can’t supply the best quality photo retouching.

Image Quality

Before choosing a professional deep etching firm, you must give priority to quality and then to other things. While inquiring customers’ reviews on their services, you’ll find the opinions of other clients about their quality of services and make sure they offer high-end photo editing quality.

Pricing

Pricing is also an important factor, there are some deep etching service provider companies that charge high prices but their quality is so poor. Beware of these providers and before deciding to hire a company, make sure their prices are unbeatable and reasonable matching their quality.

Security of your images

Also, make sure the company will give top security of your images and never share them for marketing purposes. A best clipping path company never abuses clients’ images, and to them, image security is sacred responsibility. Before submitting your projects to the company for post-production purposes, you must ask them whether they’ll give security of your images or not and what their data protection policy is.

Why You Should Choose Graphic World 24?

Graphic World 24 believes in a high-quality clipping path service as they know what the customers want. They have 50 expert graphic designers and 5 quality controllers who work around the clock to give the best outputs to their valued clients. Their customer satisfaction rating is very high as they maintain the delivery time strictly and charge very low to establish a long relationship with clients. They don’t offer all sorts of photo retouching but they specialize in eCommerce photos, fashion photos, apparel photos, headshots, sports, graduation that clients are very in need of.

Conclusion

I hope these tips to choose the best clipping path service provider will help you a lot, and you will be able to fulfill your clipping path needs. If you think I’ve escaped any points that you should emphasize on while investing in a reputed and trusted service provider company, please feel free to share them in the comments.

#ClippingPathServiceComapny

#PhotoRetouchingService

#DeepEtchingServiceProvider

Must-Know Product Photography Guidelines for Beginners

In the arena of eCommerce, product images are the essence for a successful eCommerce business you’ve tried for a long time, and you can run it if your customers are satisfied. Amazing images not only reflect your products’ quality but also act as windows in the stores, making 2 keys of business- transparency and trust. Online customers don’t have so much time to select the right product and always seek the shortcut method to do so only through viewing photos as they can’t touch the product physically. In this case, product photos are the main instruments that can help them to pick up the right product.

Only real and attractive product photos can entice online customers and persuade them to make a purchase online. And in this respect, perfect product photography is the prerequisite for creating amazing and customer-friendly photos that totally depend on some effective photography tips and tricks.

How to take perfect product photos using simple techniques

Though these product photography guidelines may seem somewhat perplexing for the beginner photographers, for some successful rounds they may be very and simple. These techniques will meet your needs whenever you’re going to try product photo shooting. Here are some tools you’ll need to get it done.

(i) A shooting table

(ii) A tripod

(iii) A light tent

(iv) Studio light

(v) A DSLR camera or your smartphone

(vi)A photo editing tool

Let’s start the product photography to take some amazing photos that must allure online customers.

1. Setting up your product

In order to set up your product, you should mange some accessories, for  instance, a shooting table and a light tent. You can easily make a shooting table by using a chair in your home, office or studio. Push your chair against a wall and tap craft paper on the wall as it naturally falls to the ground. As a light tent, you can create your own light box in a simple way.

First, you’ll need a large card box so that you can place your product in it. Then cut rectangular holes on each side of the box, and finally tape tissue paper on each side, over the holes. Tissue paper will create softer lighting for your photos so that your photos don’t have harsh shadows.

According to your product items, you should be prepared in this way.

a) If you’re going to photograph small jewelry items or other products that can’t stand in their own ways, then you should have fishing line in your tool box to stick items.

b) For apparel photos, you use mannequins that can be removed through post production process.

c) When you photograph a large item, you’re likely to use a stand mounted sweep but it may cost a little.

2. Setting up lighting

Perfect lighting is the precondition and heart of a right product photo shooting. If your lighting system is OK, then it’ll result in faultless product photos. It may be natural lighting, studio lighting, or the combination of both. Considering the situation, you should choose your lighting system and then get ready to shoot products.

If you’re shooting product photos on a tight budget, then it’s better for you to use natural lighting to save you time and effort. When it’s brightest at a day time, and you think so much shine will come out of the window, you can take photos for your products. But you should bear in mind that you should not take photos under direct sunlight as it may cause harsh shadows.

If you don’t have the opportunity of using natural lighting and you’re compelled to use studio lighting, then you should have 2 soft box lighting setups, one for your key light and the other for your back-light.

Key light should be placed in front of the product and the backlight on the opposite site. You can also use white cardboard to diffuse some of the light you don’t need. Also, in this case, you should bear one thing in mind that this lighting system gives you much control over the shooting, especially if you would like to shoot several products within a few hours.

3. Utilize a suitable tripod

In order to make your photo shooting stable, consistent and steady, you must use an ideal tripod that can fix your camera. If you’re going to shoot in a tight budget, then you use a stool as your tripod. But when you have some budget, you can purchase a nice tripod under $30 to stabilize your camera.

4. Shoot the product

The advancement in technology has made it very easy to have a smart phone camera that you can use for a seamless photo shooting.  Also, the prices of DSLR camera have recently dropped to a great extent and you can also use for your photo shooting. However, before shooting products, your camera should be in a low aperture and slow shutter speed. That way, your whole product will be in focus, leaving your product look real and crispy. When camera setting is adjusted, it’s to time take photos pressing round button of the camera.

5. Must do post-processing

It’s a wise act to retouch raw images you’ve already taken. In order to make your images polished and refined, you must do post-processing and it may cover anything from removing background to removing mannequins, changing color, or adding shadow to make them more natural and appealing. Thanks to photo editing apps to make this process very easy and comfortable. You can choose any one out of the following: i) CANVA ii) Fotor iii) PicMonkey iv) Pixlr

Or, you can utilize Adobe Photoshop if you’re accustomed to having tasks in it.

#product_photography_ideas

#Photos_for_E-Commerce Sales

#E-commerce_photography_tips


7 Secrets to Boosting E-commerce Sales

As an online seller, one of the most important facts is to increase sale. You might be giving plenty of efforts to choose the right product to sell and also providing a great customer support to stay ahead in the competition but you don’t think, you are missing something else?

It is very important to stay focused and keeping up your business with the new trends. As the customers’ behavior is changing in the E-commerce Product industry, the trends are changing frequently. Your previous technique may have worked perfectly but you cannot guarantee that the same technique will work again or will be working continuously. In addition, there are some other influential factors to boost your E-commerce sale.

We have collected some data from reputed marketers from all over the world about upcoming marketing trends. Even we would not assure you how much time it will be working out.

But we can assure you, by the end of this post you will be capable of taking your feathering store and turning it into a powerhouse that generate nonstop sales.

Let’s Go to see how!

1.Know Your Audience

Firstly, throw a question to yourself. How much do you know about your customers? You customers must have some common psychological factors. Like your customers may be concerned about budget or value or maybe they prefer to purchase high quality products.

As an E-commerce owner, you need to know about your customers’ ins and outs including their demographics, interest specifically using device, age, point of view, liking and disliking. In a word whatever possible from your side, you have to know.

Tracking your target customers will help you craft product description and images, which resonate with the specific group. Try to address some friction points in the description that might make them hesitate at checkout. The product photos should express the same feeling as product description.

2.Target Your Existing Customers

When an E-commerce owner finds their sale has decreased, they think it’s because of they don’t have enough customer. It’s a common misconception, so don’t jump to conclusions.

You should focus on your customer retention strategy instead of giving all your effort on Customer acquisition.

Please do not get confused. No doubt, it’s great for your business if they are getting new customers consistently. But marketing expenditure is relatively high for customer acquisition. So, targeting the existing customer is very easy and cost effective.

Why?

There is a saying that “Old is gold”. The same thing can be applicable in case of E-commerce business. Keep targeting your old customers. As they trusted, for once, you can easily convince them again. In addition, targeting them will create positive impact on them. They are already known to your brand. There is no learning curve as they know how to use your product. So be focused on improving their experience.

You have a huge number of tools to keep track with your customers. Even you can track those, who visited your site for once. You can also go for them.

3.Use Email Marketing

Email Marketing is another method to grow your business. You can do email marketing in two ways.

An email list you already have:  You Can buy emails or can collect them by different techniques. You might be using a check out system, and there you may ask for email id. You can start to email marketing campaign with that.

Creating a new list: If you do not have an existing email list, you can run paid campaign to a page (landing page) where potential customers will opt in your email list.

There is another purpose of email marketing to stay connected with your customers. For example, you can tie you offerings with the following dates:

(a)Christmas

(b)Father’s Day.

(c)Valentine’s Day.

(d)Thanksgiving

(e)Father’s Day.

(f)Mother’s Day.

4.Prove Customers That You Are Trustworthy


Suppose, you are selling ladies shoes and one of your customers liked one of your collection. She set her mind to click on the shop Now/Add to Cart button. Before that she must check whether your site is trustworthy or not. If your site is not secured, she will be leaving your site with 2 negative impressions. One is you are not going to deliver the exact product you have displayed on the site. Another is She might have to face Credit card fraud issue.

You must secure your website with necessary security for yourself and also for your customer’s safety. Website security is a major concern for the online shoppers these days. 46% of Americans have been the victims of credit card fraud issue in the last five years. You have to realize this issue and take necessary steps.

But How Can You Do That?

Proudly, Display any security badges your site is using.

Here is some example of popular security badges.

Wait a moment. I want to be clear. Be sure that you are not cheating or misleading your customers. Please do not use these badges if you are not connected with any of these companies. If you do so, you might have to face legal issues.

5.Use Image When You Display Customer Review

 User review is a great way to convince another customer. But a review with a nameless or faceless does not make a significant impact. Upgrade your reviews to the next level. Add a real and attractive image, and the full name of the person and title. That will be more meaningful.

6.Use Human Model in Photo

 A British study proved that human models are more effective than skinny models/dolls. And the most important thing about realistic model is, they left the viewers feelings more positively. Even realistic models show a high level of confidence in the image. That makes a viewer to click on the “Add to Cart” button. This study was experimented for both men and women.

In addition, a realistic model helps a user to put themselves into the screen. Specially in fashion industry, you have to feel your customer to think “they look like me, I will also look as good as they are”. If you cannot do that, then you are going to lose to potential customer.

 7.Make Purchasing Process Easy

In order to boost you E-commerce business, you should also pay attention to purchasing process. If online purchase process is so complicated, then you will lose customers in the middle of purchase. Therefore, you should make simple and easy purchasing method. In this respect you may have physical location and online shop simultaneously. You may have considered the process ‘Buy online and pick-up from store’ for your customers. To attract customers, you can also start buying at discounted rate and saving shipping cost.

Final Words

Now you’ve learnt what factors are the Secrets to Boosting E-commerce Sales and very instrumental to succeed in this sector. Conventional business success also depends on these 7 secrets and considering these factors you can be successful in this competitive business world.


free counter

#E-commercePhotoEditing

#AmazonPhotoEditing

Ins & Outs of Amazon Photo Editing Requirement

Amazon is one of the most popular E-commerce sites all over the world. More than 300000 USA-based online sellers are selling their products on Amazon. Just because they would like to deliver the best experience to both buyers and sellers. Most of the online sellers show their interest in selling their products through Amazon. And similarly Customers from around the globe also express their super positive interest in Amazon.

There are some secret reasons behind Amazon success history. Few of them came to the light. One of them is; Amazon knows how to present products online before customers well and what product photos entice them most. And for this reason, Amazon applies some amazon product image requirements that every product photographer and graphic designers must comply with. If any product photo doesn’t maintain Amazon photo editing requirement, then the product won’t be in Amazon Product Listing.

We Want to Reveal the Concept of High Quality Image

We all know that an image is worth a thousand words, and also found from a research that a human brain is able to process images sixty thousand times faster than the text. So while you are listing your products on an E-commerce site, you should be aware of image quality because your revenue is just depending on your product presentation.

If you are using a low quality image of your product, then a customer can easily predict that your product quality will be poor too. It will also produce a negative impression on your business. But if you are using high quality, professional looking image then a customer will get a reason to click through your detail page and look at your product reviews to consider your product over the race.

So, even if you have written the best description or have a good number of positive reviews, laterally if you are using low quality image then you are going to fall in a big trouble. In addition, you will have a huge number of competitors in the market. If you want to stand out among them, you must have to go with quality image.

We hope you have got a clear idea of image presentation in Amazon. So let’s get back to the topic.

Here, we will describe about amazon photo editing requirement in detail.

Technical Requirements

Product images you need to submit to Amazon must fulfill the following technical necessities.

  • Images must be in JPEG (.jpeg/.jpg), GIF (.gif), PNG (.png) or TIFF (.tif/.tiff) format.
  • Preferred photo pixel dimensions must be of at least 1000 or larger in either height or width.
  • CMYK or sRGB color mode preferable.
  • Files names must contain the product identifier (Amazon ASIN, 13-digit ISBN, EAN, JAN, or UPC) followed by a period and the proper file extension (For instance: B000123456.jpg or 0237425673485.tif)

Note: Dashes, spaces or other characters in the filename will avert your photos from going online.

Amazon Site Standard Product Images

For photos named by product identifier without a different code or named with the MAIN variant, and show as the chief image on the product detail page,  Amazon maintains the following site product image standards:

  • The image must be a professional photo of the product being sold or the cover art. Illustrations or drawings of the product are not permitted in any way.
  • The recommended image must be professionally lit, in focus and photographed, with a realistic color and even edges.
  • The image must not have confusing or gratuitous extra objects.
  • In sphere of books, music, and video/DVD images, there should be the front cover art, and must fill 100% of the image frame. They don’t permit promotional stickers, jewelry cases and cellophane.
  • Images of other products must fill 85% or more of the image frame.
  • The product must be in the frame.
  • Backgrounds of images must be pure white (RGB 255, 255,255)
  • The product image must not contain extra graphic, text or inset images.
  • No offensive or pornographic materials.

For other additional view images

  • The image must be of, or relate to, of the product being sold.
  • The recommended image must be professionally lit, in focus and photographed, with a realistic color and even edges.
  • In some respects, other objects or products are permitted to assist to demonstrate the utilization or scale of product.
  • The product must fill 85% or more of the image frame.
  • No cropped images.
  • Demonstrative graphics and text are allowed.
  • Environments and Backgrounds are permitted.
  • No Offensive and pornographic materials.

Besides that, We Have Few More Proven Tips for You to Stand Out in the Competition

  1. Try to Understand Customer’s psychology

When a customer goes through your listings, they will visualize themselves wearing/using the product. You can assume this as a psychological game. You have to track your audience psychology. Try to present your product in that sense so that a customer can easily visualize himself/herself using the product.

  1. Be Liberal While Listing Products:

Amazon allows a merchant to use 7-9 images per page for a specific product. Please use all the spaces of the page. Display each and every corner of the image. So that a customer can visualize the whole product before his/her eyes. It will help you to overcome the disadvantages that every online retailer faces. Display the product as like you are putting the product in the hands of the customer. And then accelerate your conversion rate.

  1. Maintain Quality Images:

Amazon expects high quality image from you. According to Amazon, images must be focused, provisionally lit and with realistic color and edges. Do not use artificial color to make the product attractive. It may increase your sell but in the long run you will earn some negative reviews. You may need to use color correction service, but be ethical in that case. Be sure that you are using the same color as your product have.


  1. Provide Informative description

You might be selling products which has some important features, instructions & cautions to use. You have to write it properly. Ex: If you are selling antic knives, you should describe how to handle it; what not to do with it. If you are selling school bags, you must mention whether it is water-proof or not. How many parts does it have and any other things related to it. You may lose your dedicated customer for the lack for sufficient instruction.

  1. Describe How You are going to Deliver the Product

It might not seem intuitive to describe how will you send the product, but it is really important. When a customer goes to the market, they expect their product with a nice box or packet. By adding delivery information, you are assuring your customer that the product will look fine.

Try These! We are assuring you, these small tips will create a positive effect on your business.  Please keep in touch with us to know more amazing tricks and tips about Amazon Product presentation.

#Amazon _Photo_Editing
#Amazon_Photo_Editing_Service
#Amazon_Image_Editing_Service
#Amazon_Requirements

Graphic Design & It’s Future

Graphic Design is the technique or art of joining images and text for marketing or advertising purpose. Without any doubt it is really important for a company to have a bunch of expert graphics designer who are able to design advertising copies, business card, visiting card, magazines etc.And the companies who are involved with online business; No doubt, Attractive Graphic Design will help them to bring much more customer and visitor.
Surprisingly Graphic Design is getting tremendous popularity over the world. Which indicates towards the increasing demand of expert Graphic Designers?

Graphic Design in Near Future

As the number of companies are increasing with their products and services, An effective and efficient Graphics Design is the key factor of marketing your business over the whole universe. Simply, a Graphics Design is the reflection of your business and products. A catchy and lucrative Graphics Design helps your customer to feel the difference between you and your competitor.

Main Purpose of Graphics Design is Logo making, Template design, Brochure making, Photo Editing, Branding, Visiting Card, Business Card and Info graphics. An expert Designer must be able to design graphics, visiting card, business cards, brochure and info graphics according to the company’s demands and requirements of the business. Designs that not only attracts customer but also deliver your message to them.
Info graphics are the new comer in the field of Graphic Design and also becoming the best way to make the graphical representation of data or information to the people.

graphic Design

You can deliver an unforgettable impression in the customer’s mind by an attractive infographics and when a customer will be needed a service, he/she might be able to remember you because of that.
Logo, Brochure, Visiting card, Business cards, is an integrated part of any business of any size. Eye-catchy business card or visiting card makes an impact on visitor and that will convert a visitor into a potential customer.

#Graphic_Design

#Photo_Editing

About Us

Graphic World 24 is one of the world’s largest photo editing & image manipulation service provider companies based in Bangladesh. We have been offering image editing and photo manipulation service since 2007. In these couples of years, we have become a team of 55 dedicated graphic experts. Whatever we are doing here, just we are doing perfectly...

read more
Copyright Graphic World 24 @2024 | All Right Reserved