Making an image background transparent using photo editing software like Adobe Photoshop not only provides an excellent array of astounding showcase choices for your eCommerce products but helps design images in different looks. An image transparent background is very helpful to put a product against such a background which can assume various colors dynamically. Images designed in such backgrounds on highly responsive websites can interact in different ways with backgrounds depending on the user’s screen. Thus, the transparent background can create extra contrast, peculiarity and even visual interest to your overall image look.
In Photoshop, making an image background transparent and saving the done file in perfect format is somewhat easy if you have gained a little knowledge about photo editing in Photoshop. This photo editing tutorial will show you how to perform the task in a slow but effective way.
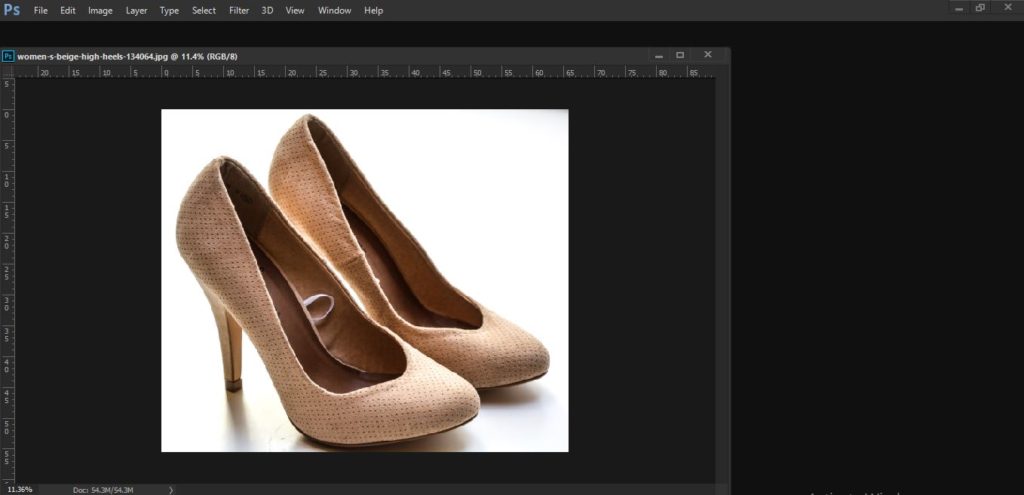
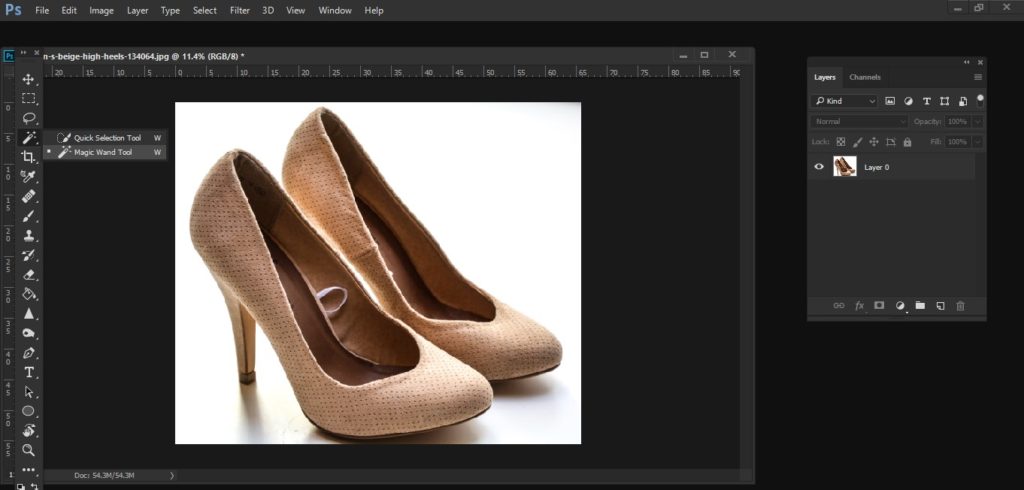
The first step starts with the opening of the image in Photoshop. It’s better to open the image in JPEG format and in a white background. In this respect, I’ve chosen a pair of ladies’ shoe image and got opened in Photoshop.
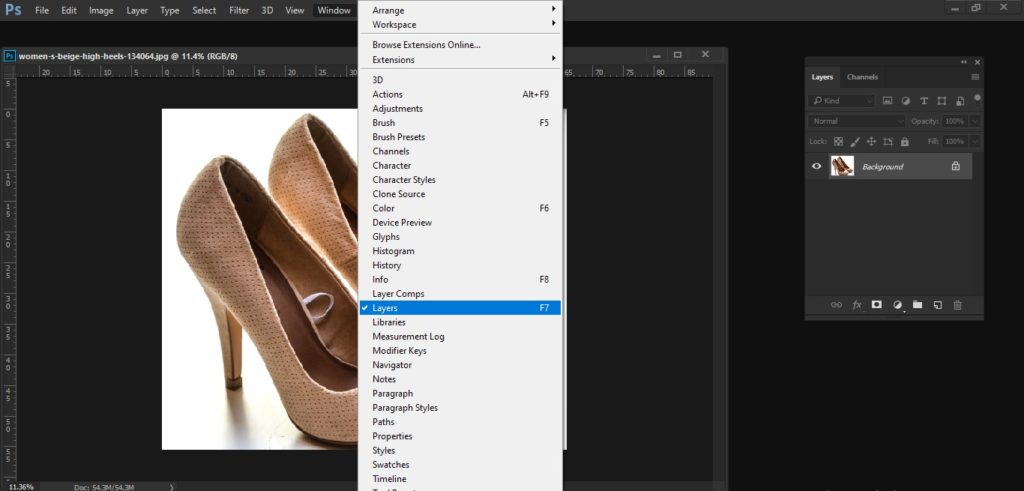
Now go to Layers panel, it lies in the right of photo window but if you’re not able to find it, then it can be accessed by going to Window, then to Layers from the dropdown menu.
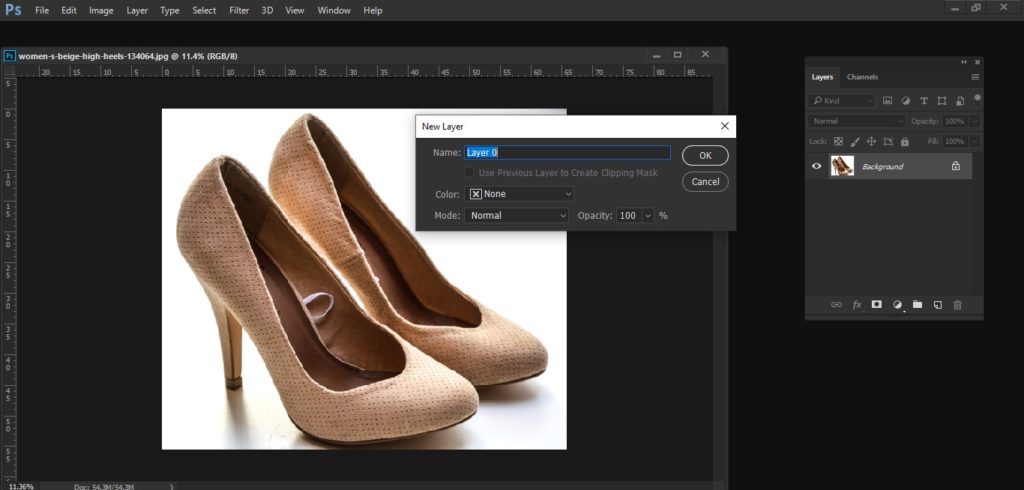
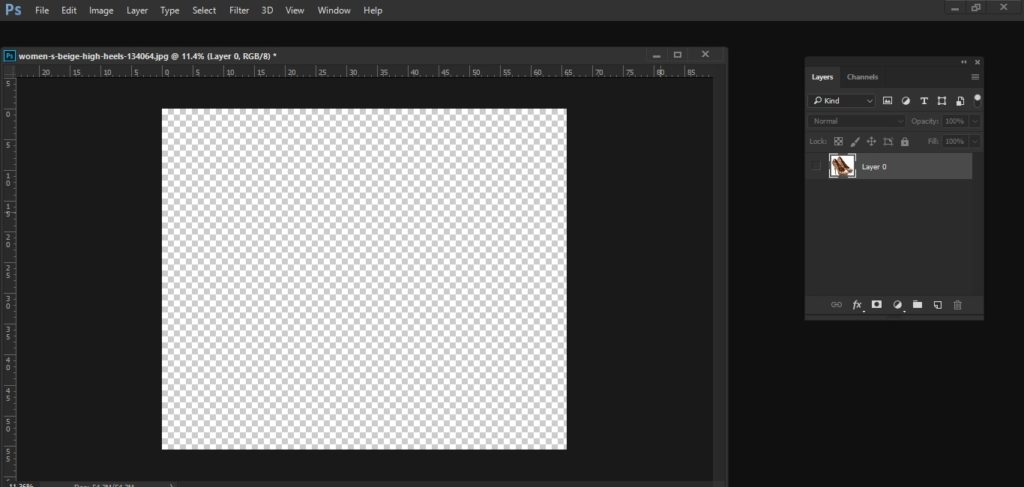
In Layers panel, once you double-click on the Background layer, you’ll find a New Layer appears asking you to rename it. You can rename it or leave it as Layer 0 by pressing the OK button. In this case, I leave the layer as Layer 0 and press OK.
Now the Background layer is unlocked, and you can get a transparent background look whenever you delete anything from it.
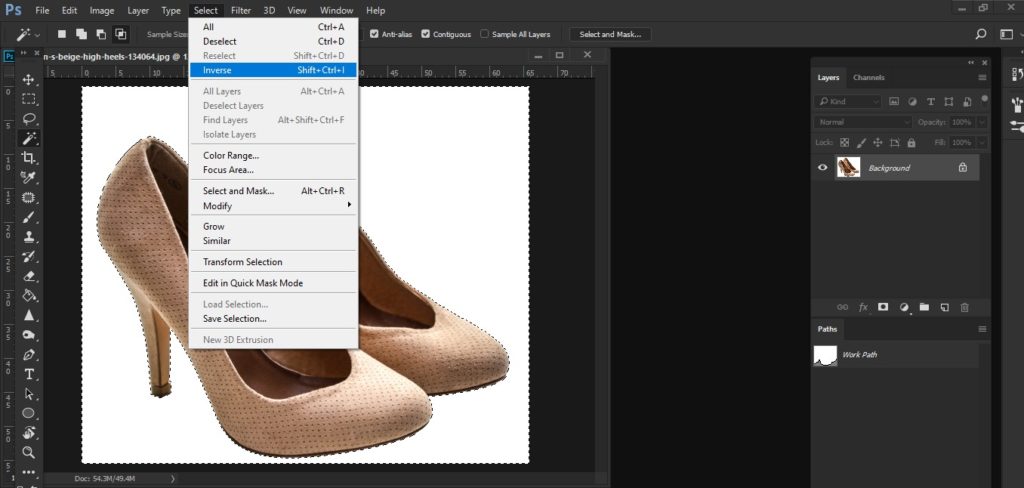
Now comes the turn is to select the object, not the background. In Adobe Photoshop, you’ll find several selection tools to select an object in the image. But in this respect, you’ll have to choose the Magic Wand tool rested in the toolbar on the left-side in Photoshop.
Afterward, press Ctrl+ Click on the white background of the image and view the result what it looks like. Photoshop will try to pick the object from its background. And the selection will look like ‘marching ants’ around the selection.
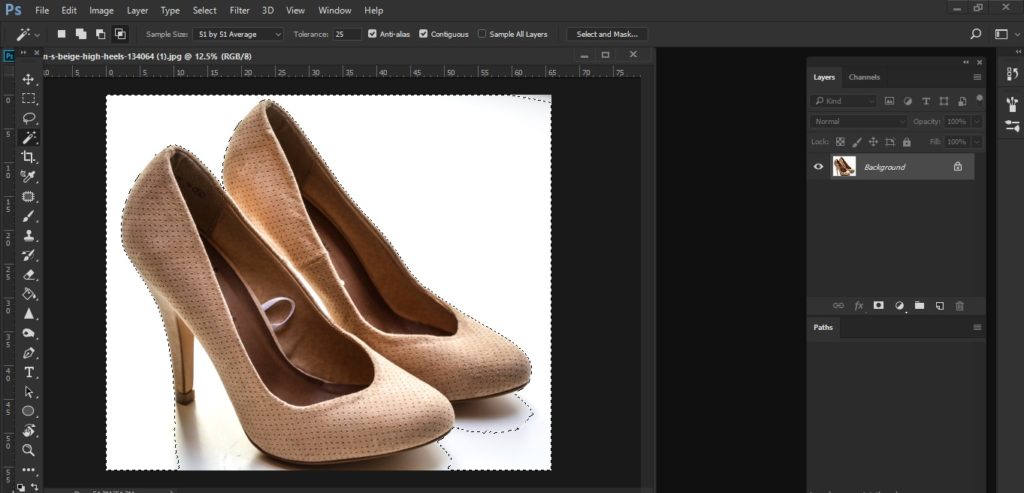
In case, you’ve not made selection rightly, then you can utilize the tool to remove background from the selection. In this instance, we’ll use Subtract from the selection tool icon to remove shoes’ shadow from the selection by clicking on the parts of the shadow with the tool until the selection contains only the shoes.
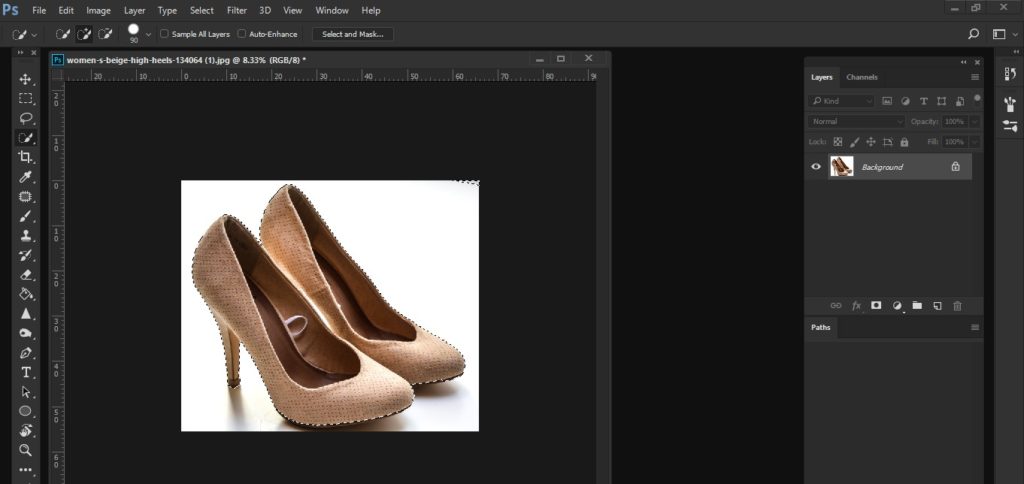
Just when you’ve finished selecting the whole object, press Windows Ctrl+Shift+I to select the inverse. Or you may go to Select and then to Inverse from the dropdown menu to do so.
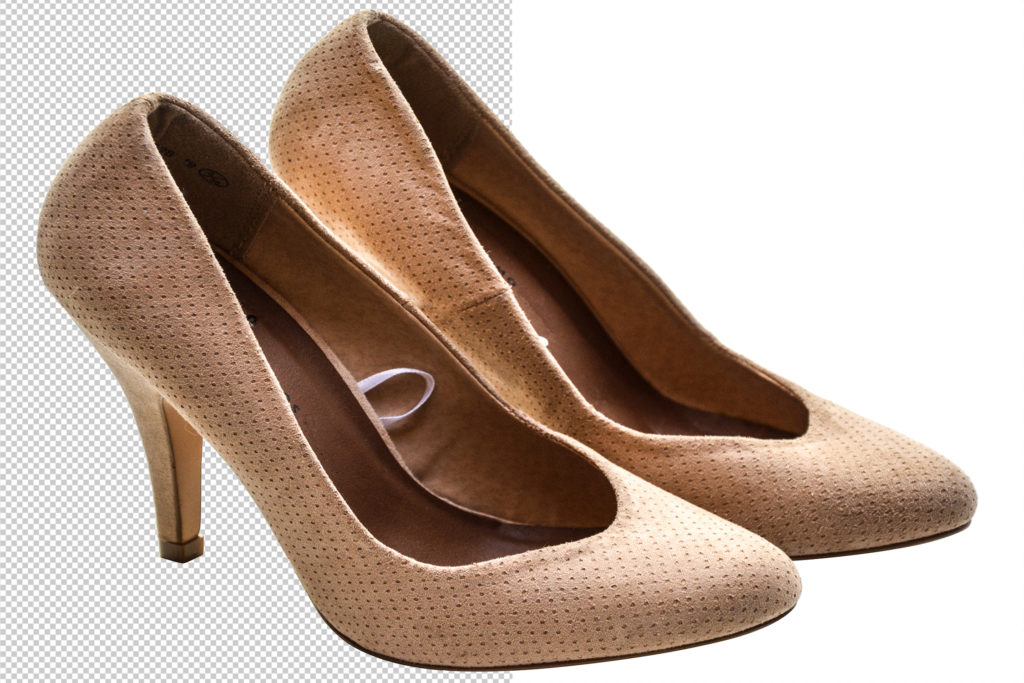
With the selected inverse, now press Windows BackSpace and you’ll find this command has made image background transparent.
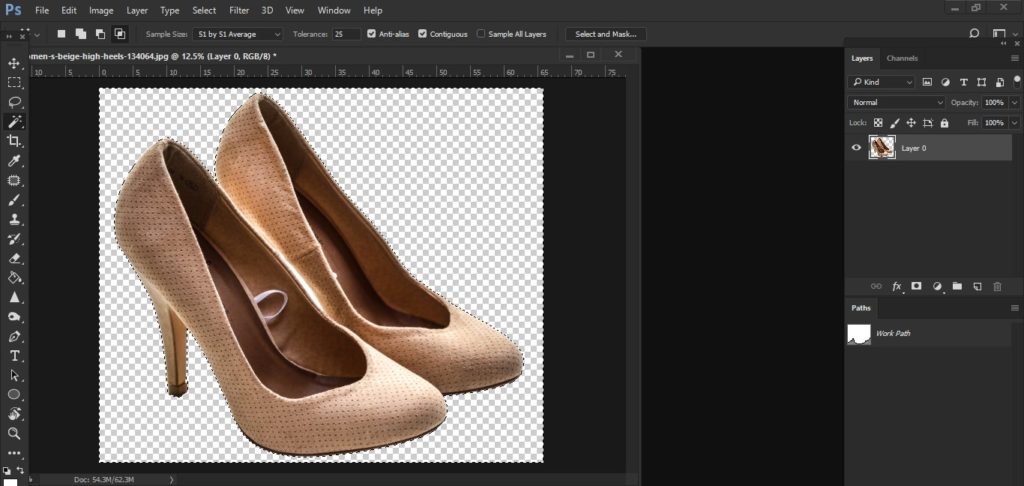
Image background transparent is indicated by white and grey check pattern and if you would like to deselect the selection, just press Windows Ctrl+D.
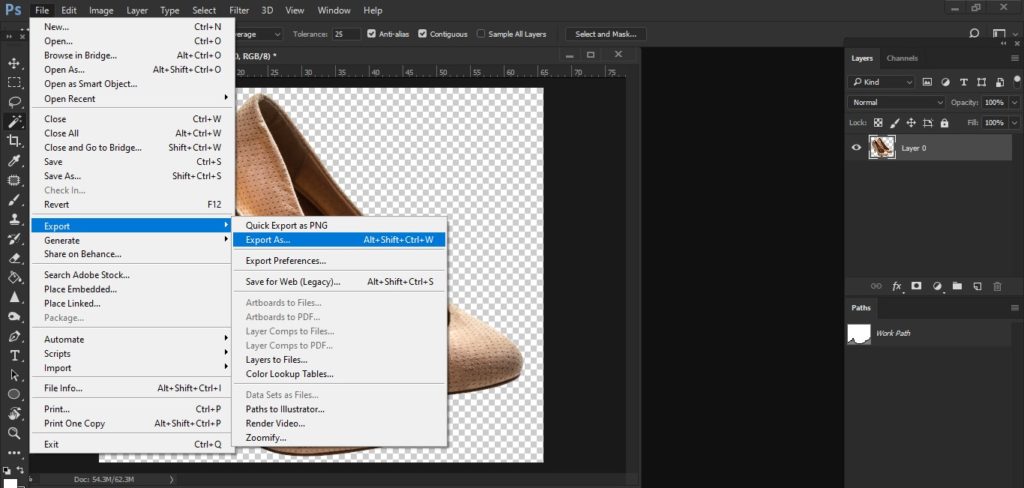
Saving the photo in the perfect format is very crucial if you would like to upload it with a transparent background on your website. The suggested format to save your done photo is PNG-24. And it never allows pixelated halo when embedding images in various colored backgrounds. But it happens in the case of GIF or PNG-8 formats.
You can save your images in PNG-24 formats by pressing Windows Ctrl+Alt+Shift+W. Or you may simply go to File, then to Export and then to Export As… from the drop-down menu of the application window to do so.
A dialog box appears, and under File Settings on the right side of the dialog box, you’ll have set file format as PNG and confirm that the Transparency box is checked. Never check the Smaller File (8 –bit) box as it will convert the file to PNG-8 format.
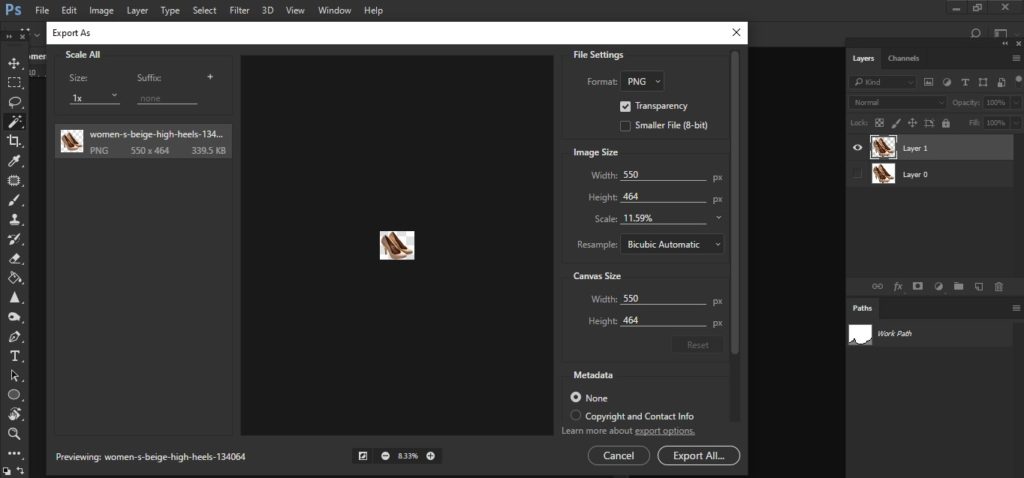
On the left-hand side of the dialog box, you’ll find file size for your PNG format and file size should be minimal as much as possible. My recommendation is that per website image size should be 200KB or less to accelerate website loading speed. While on the right-hand side, under Image Size, there is the option to increase or decrease the Height and Width of the image. That is very helpful to adjust image size as well. A smaller dimension means smaller image size and a bigger dimension means a bigger image size. Nevertheless, you must not set the dimension reduced than you would like to get them to look on your website. And for doing so, images may be pixelated or blurry.
Your product image should be saved at a minimum of 50% larger than the size you would like to expect it to show. And it’ll make customers spot your product on a retina display. Retina display involves the capacity to show product images crispy on all the devices, and this doesn’t create any pixelated issues. For instance, if you would like to display your product at 450px wide on the website, then you must set images at a minimum of 650px wide here. That’s why there will be a while balance to maximize your photo size if you feel like to minimize file size.
When you’ve finished setting image dimension, press Export All…..
Once Save dialog box appears, select the folder in which you would like to save the images for displaying on a website. And separate optimized image files from original image files not to make confusion when loading images on the website. Name your file name and set the file to.PNG format.
Click Save.
Now you can change image transparent background using various backgrounds you choose for your eCommerce website. And you should show it in the way customers will be captivated to view images and decide to buy a product.
This is the best way to remove background or change background from a product image, first, making image background transparent and then altering the background. I hope this procedure will be very helpful to change any type of image background if you’re accustomed to editing images in Photoshop. Provided that you think I’ve escaped any point in the article, please feel free to share it in the comment.
#ImageBackgroundTransparentPhotoshop
#ChangeImageBackgroundTransparent
#RemoveWhiteBackgroundImagePhotoshop
#PhotoBackgroundRemovalService
#BackgroundRemovalService
#RemoveBackgroundService

Graphic World 24 is one of the world’s largest photo editing & image manipulation service provider companies based in Bangladesh. We have been offering image editing and photo manipulation service since 2007. In these couples of years, we have become a team of 55 dedicated graphic experts. Whatever we are doing here, just we are doing perfectly...
read more
Address: 51/1, Lalbagh Cross Road, Dhaka-1211, Bangladesh.
Phone: +8801621747032
Email: info@graphicworld24.com
www.graphicworld24.com